Do you know how to install WordPress quickly & correctly? In fact, there are several easy ways to do that. Most of the time this process is quite smooth, but there are some cases that require special attention.
In this WordPress installation guide we will cover all the possible scenarios and review all modern ways to install WordPress on your site
What Is WordPress?
It’s important to understand what WordPress is before you proceed with its installation. WordPress is a free open source content management system. It’s acknowledged as one of the easiest, user-friendly and popular ways to create a website.
The system was created for users with any technical level. It is good for both beginner and professional developer. No wonder that 33% of all sites in the world are made with WordPress. And it is growing +3-5% each year
Way #1. Choose Modern Hosting with 1-click WordPress Installation
There are plenty of modern hosting companies that provide easy 1-click WordPress installation. In most of the cases it resolves any further questions.
If you haven’t decided which hosting to choose for your future WP site, go ahead and pick one of the following providers:
If you’d like to get to know, how we came up with this list, please check our article: “Best Hosting Providers for WordPress site”.
Let’s take a closer look on how to install WordPress on these three great solutions we’ve prepared for you.
How to Install WordPress on BlueHost Hosting
First of all, we have to emphasize that BlueHost is officially recommended by WordPress. Second of all, they’ve created one of the most user-friendly WordPress Installation systems.
When you choose one of their WP Hosting Plans, the system automatically installs it. Therefore, when you first login into your account you already have WordPress installed in “My Sites” Section.
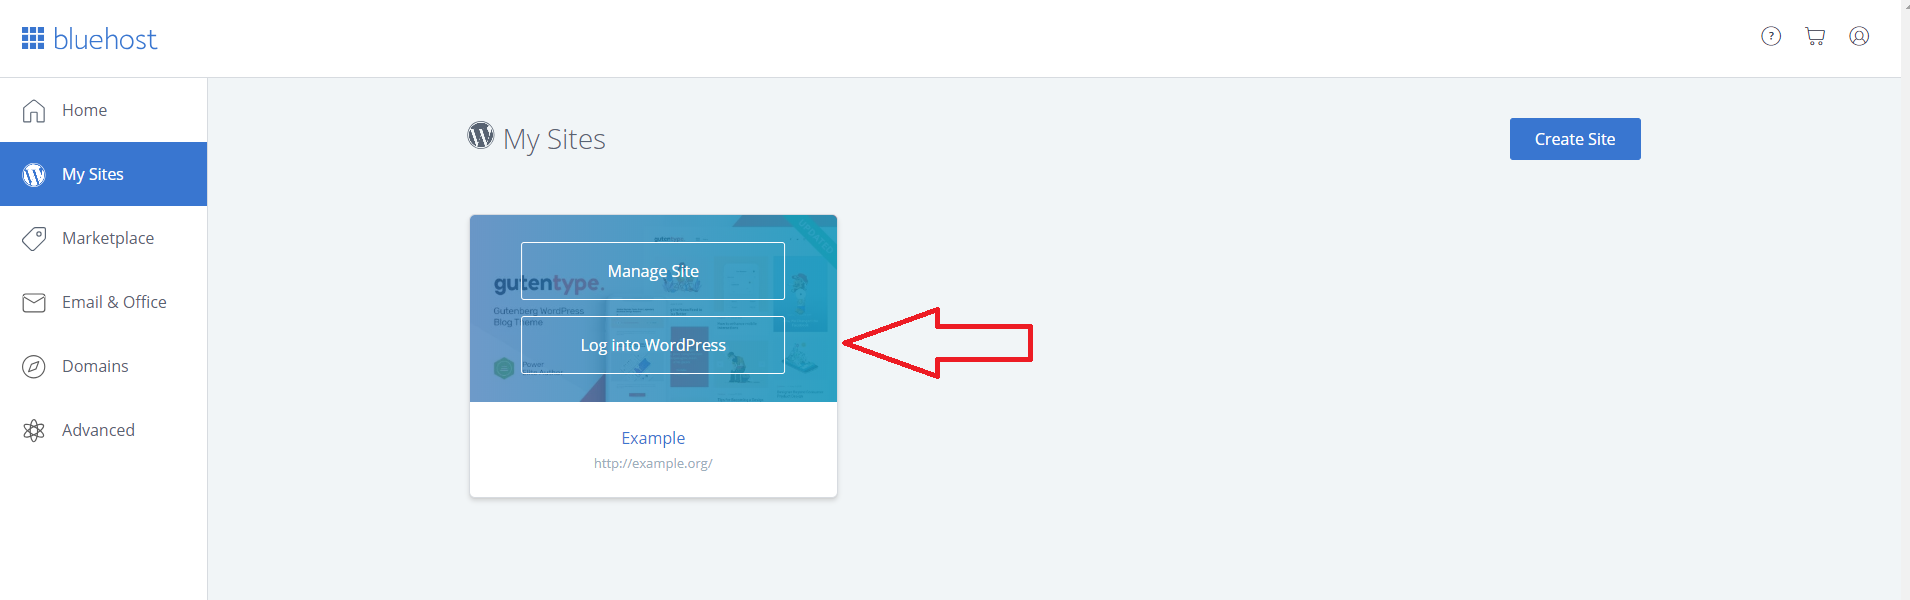
All you need to do is just click “Log Into WordPress” button. It will get you to your WP dashboard.

That is it. You are good to start working on your WordPress site.
If you need to create one more site on BlueHost, simply click “Create Site” button in “My Sites” tab.

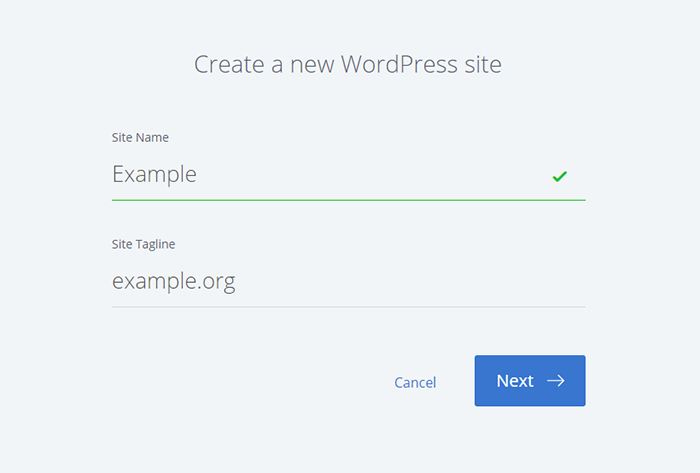
Then, just follow the installation wizard. Choose the site name and tagline.
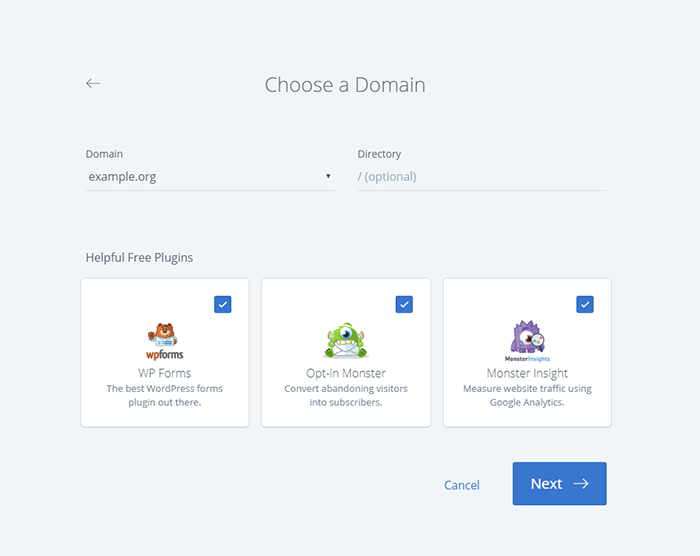
After that, choose your domain name and pick free plugins.
Confirm your details by email and log in.
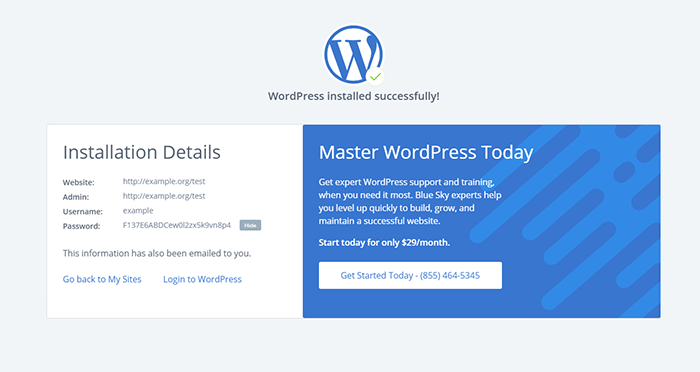
Make sure to save your access credentials. On this final screen you can either go back to your Sites Manager or login into your new site Dashboard.
That is it. Your new WordPress site has been successfully installed on BlueHost hosting.
As you can see the process of WordPress installation on BlueHost is absolutely easy and intuitive. One doesn’t need any special skills to complete installation.
How to Install WordPress on SiteGround Hosting
SiteGround is also a hosting provider, officially recommended by WordPress. It’s well known as affordable and user-friendly web hosting system. It also offers quite a simple WordPress installation.
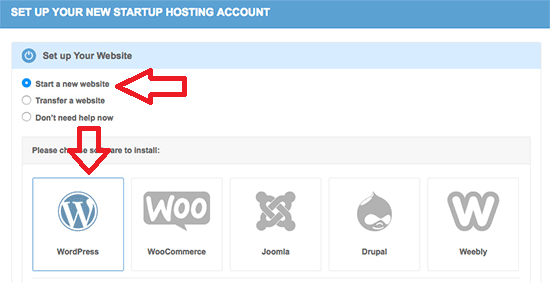
Once you create an account you will be headed to a screen with an offer to create your first site. Select “Start a new Website” and “WordPress”.
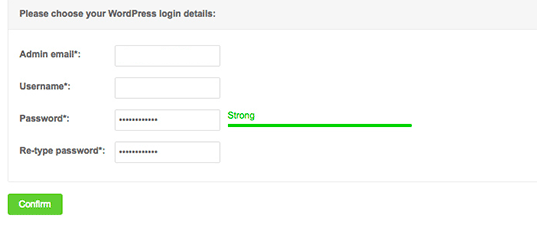
On the next screen you will need to fill in your email, username and password. You will use them to login to your WP dashboard.
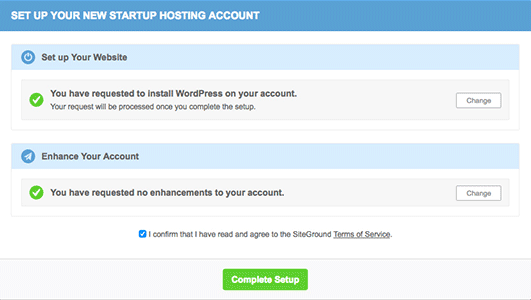
Once you click “Confirm” you will see a screen that shows your selections. Now, just review them, check the Terms and Conditions agreement box and click “Complete Setup”.
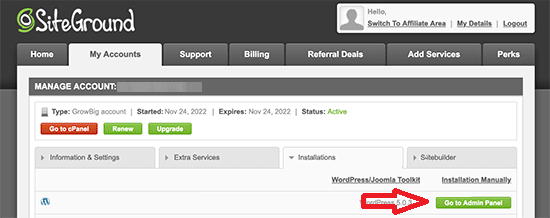
After that, you will see a Success Message that your SiteGround Hosting account is ready to use.
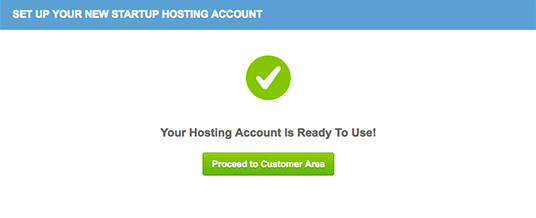
Good Job! Now, click “Proceed to Customer Area”. Here you can login to your WordPress DashBoard.
EasyWP
EasyWP takes pride in being both a super fast and reliable managed WordPress hosting solution that’s meant for everyone. At a very affordable price, you’ll get the ultimate WordPress experience with 99.9% uptime guarantee, easy backups as well as 24/7 Namecheap support, and free SSL & CDN. From the initial setup, everything is ready with just a few clicks.
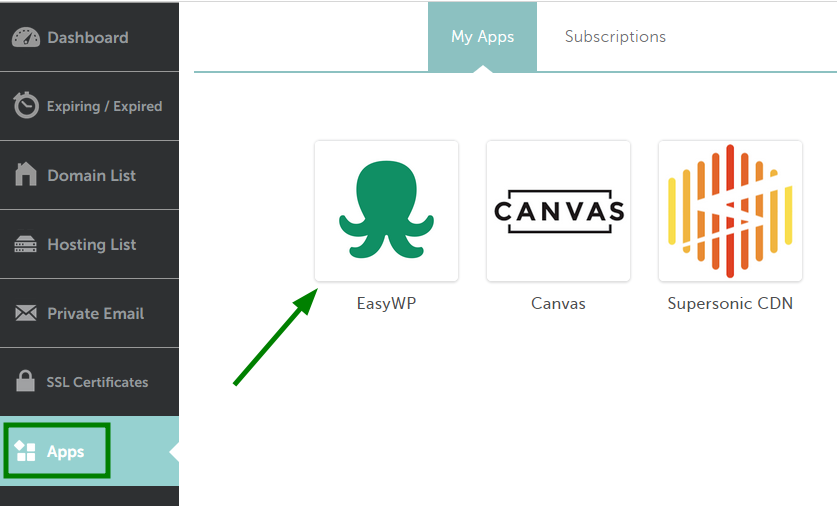
Once you have purchased an EasyWP hosting package, click on the EasyWP icon in the Apps menu.
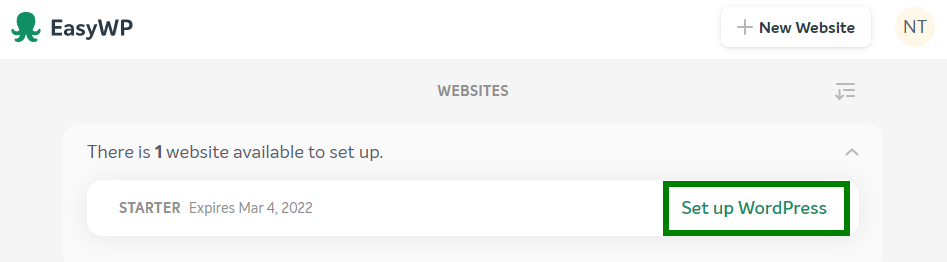
On the next page, choose the Set up WordPress option:
After set up is complete, you will have the option to pick a domain name for your website and select a category:
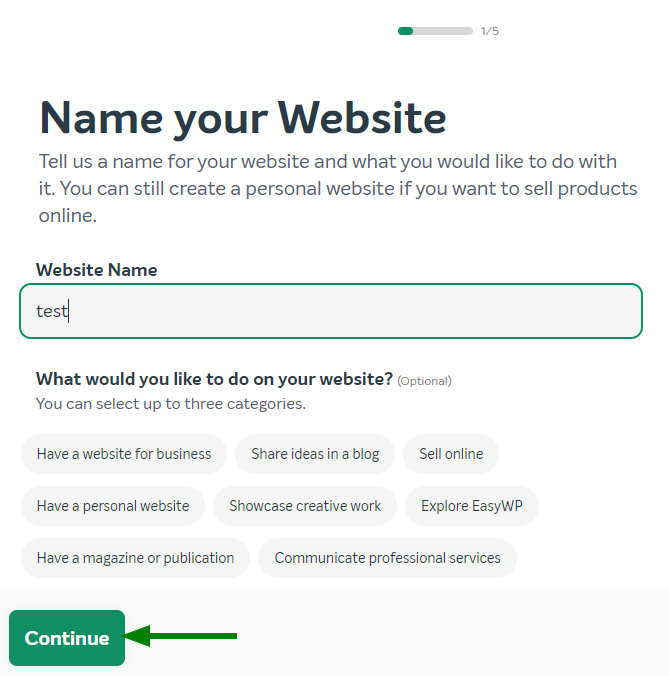
You can then choose to continue to your new website using a free domain from EasyWP. If you want to use one of your registered Namecheap domains, enter the URL or select it from the list. If you prefer to use an external domain, point it to Namecheap’s FreeDNS, and it will appear in the Your Domain on Namecheap drop-down menu.
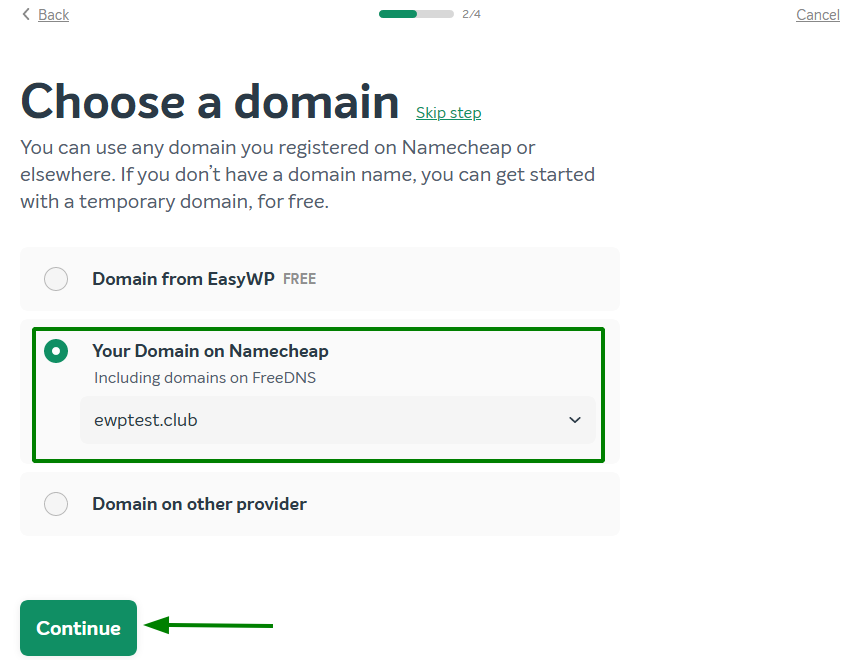
To proceed, click Continue.
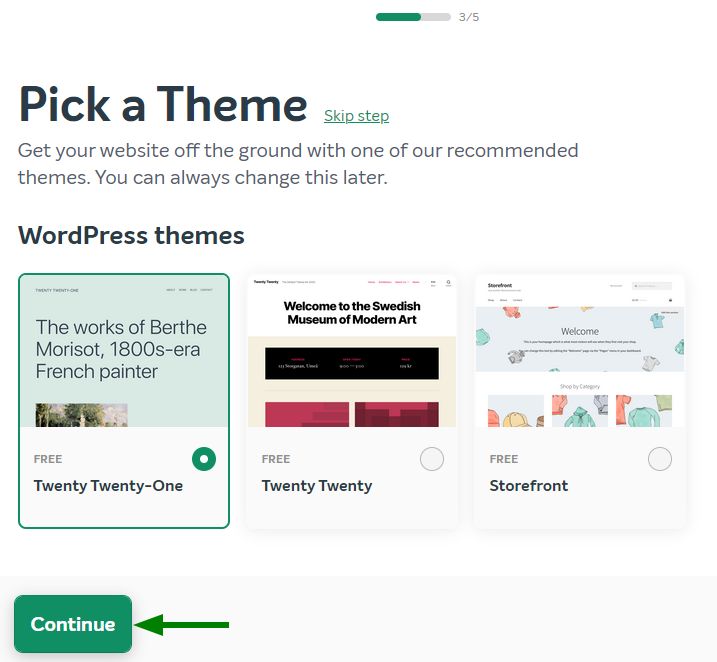
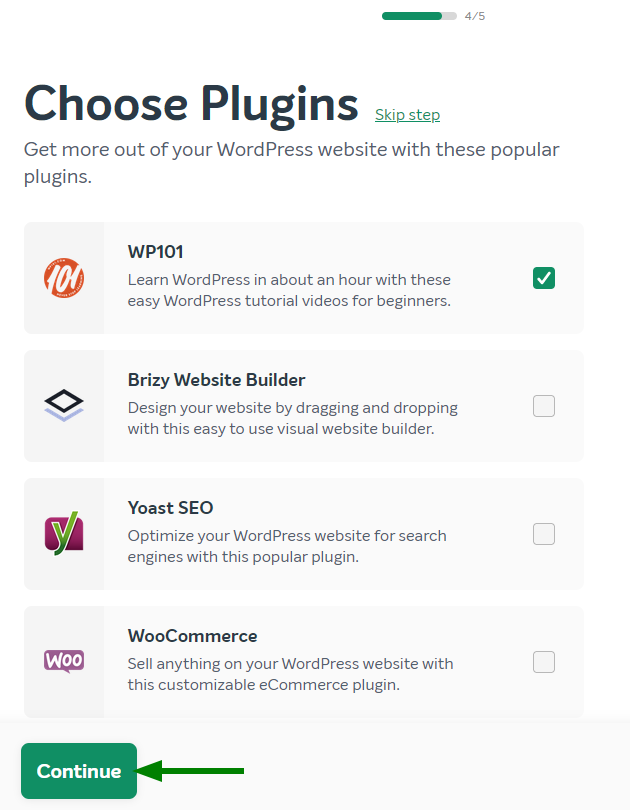
On the next pages, you will be able to select a theme for your website, as well as the option to choose from several popular plugins to get pre-installed.
To proceed with the installation, check the details and click Continue.
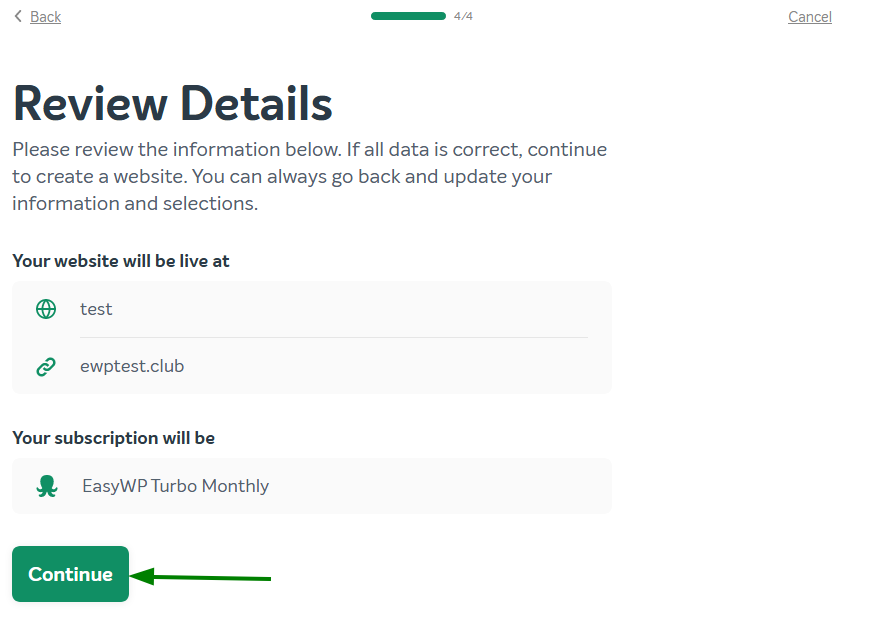
In a few seconds, your WordPress website will be ready for use. After the EasyWP installation is finished, you will receive an email with your account login information to the contact address.
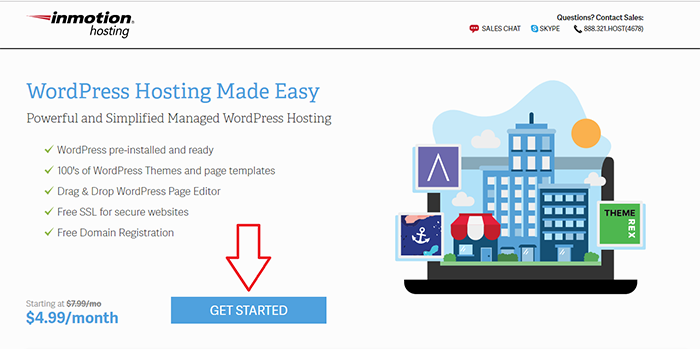
How to Install WordPress on InMotion Hosting
Inmotion Hosting (or InMotionHosting) is also one of the most popular WordPress hosting providers in the net. It combines good site speed and affordable price.WordPress on this hosting can be installed within the account creation process. First, click “Get Started”.
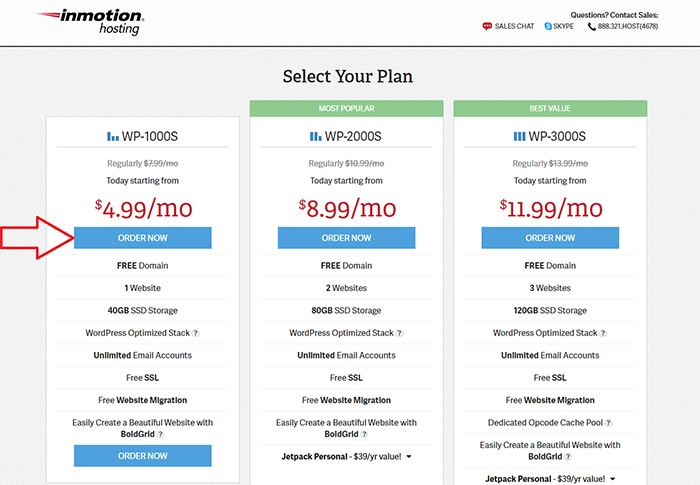
Then, pick a suitable hosting plan for you.
And on the next screen make sure to check “WordPress Auto-installer”.

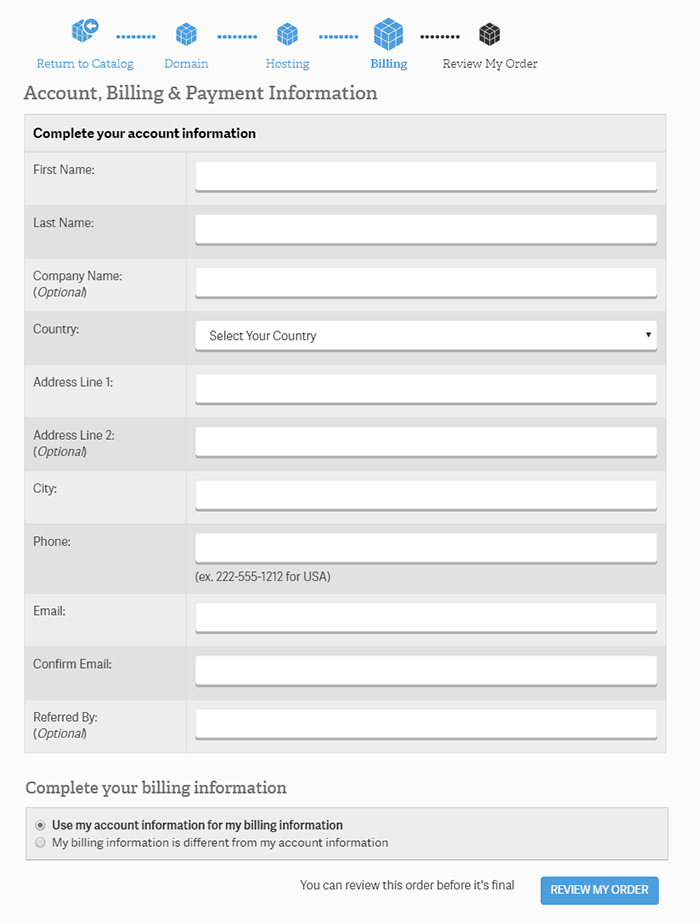
Then you will see a screen for personal details and checkout. Just fill it in, review your order and complete a registration.
As you can see, it’s quite easy and doesn’t require any special technical knowledge.
How to Install WordPress from CPanel (Control Panel)
If you chose to use the web hosting that doesn’t provide a WordPress installation during sign up process, you can install it using your CPanel (Control Panel). Although, some of shared hosting providers may use different hosting management software systems, the overwhelming majority use CPanel.
All you need to do is to login to your Control Panel and find one of the following options:
- Softaculous
- Fantastico
- QuickInstall
- WordPress Installer
- Autoinstaller
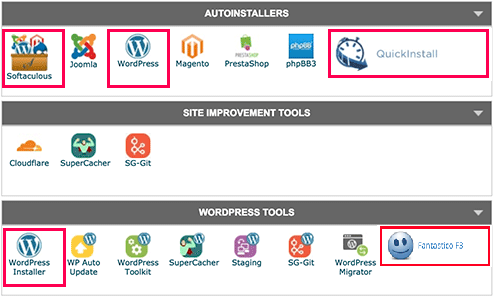
If you have any of them, go ahead and click on the one you have. This will launch a step-by-step installation wizard. They are very similar and basically help you choose a place for your WordPress installation and set your access credentials.
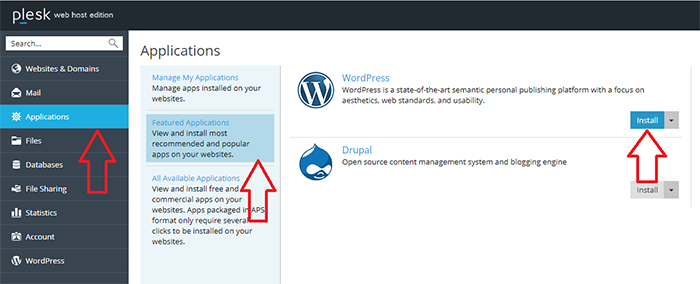
How to Install WordPress with Plesk
Some web providers use Plesk Hosting Control Panel instead of CPanel. It also has quite an easy WordPress installation system. Navigate: Applications -> Featured Applications and click “ Install” next to WordPress.
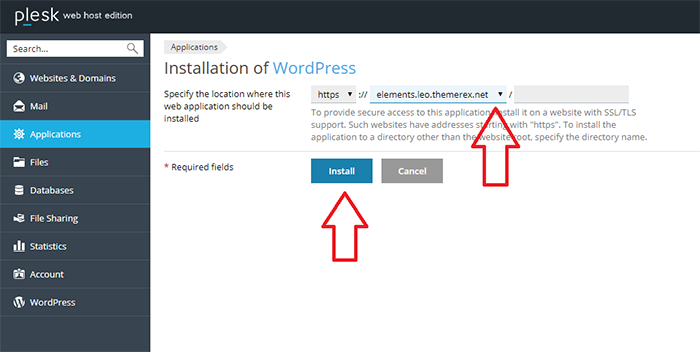
On the next screen you will be able to choose the domain, installation path, just click “Install” to continue.
Once the installation is complete, you will see your automatically generated access details.
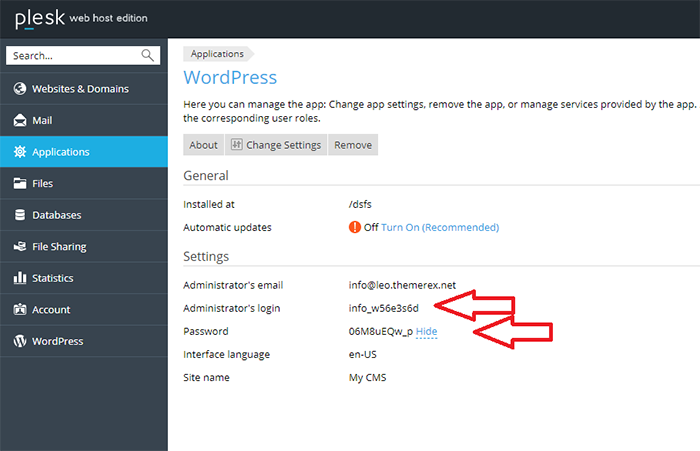
Make sure to copy and save these credentials. That is it. The WordPress engine has been successfully installed with your Plesk.
How to Install WordPress with FTP (Manual Installation)
Sometimes there is a need to install WordPress manually via FTP. It may happen in case the hosting provider doesn’t provide an easy WP installation tool or in the cases when you make a WP site for your client and for security reasons you have only FTP.
It’s not a problem. The installation will take you no longer than 5 minutes anyway.
First, prepare your database credentials (hosting provider, database name, user name, password). If you don’t have one, you will need to create a new database.
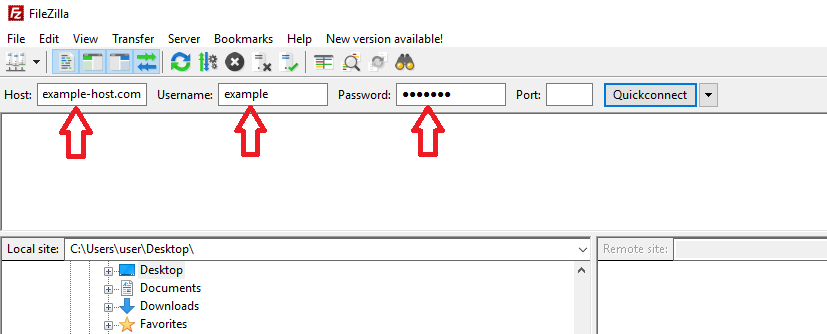
Second, prepare your FTP credentials (host, login, password).
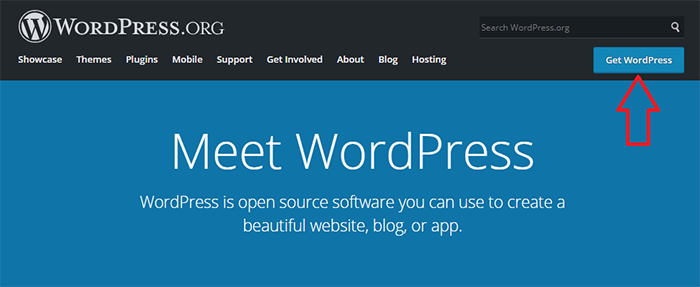
Third, go to wordpress.org and click “Get WordPress”.
On the next screen click “Download WordPress”.
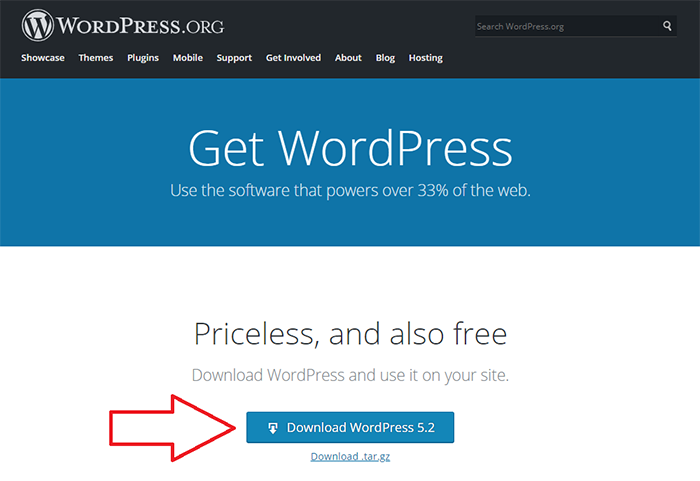
Your browser will start loading the WP zip-file. Once it’s loaded, save and unzip it on your computer. You may use WinZip soft for that. Your WP directory should look like this:

The fourth step is uploading these files to your server. You can use any free File Transfer client for that. For example, FileZilla or Total Commander. Enter your FTP credentials and click “Connect” or “QuickConnect”.
Once connected, open your “wordpress” folder on the left part of the screen. On the right part choose the server directory where you want to install WordPress. Then, select all the files -> right-click -> “Upload” or simply drag and drop files.
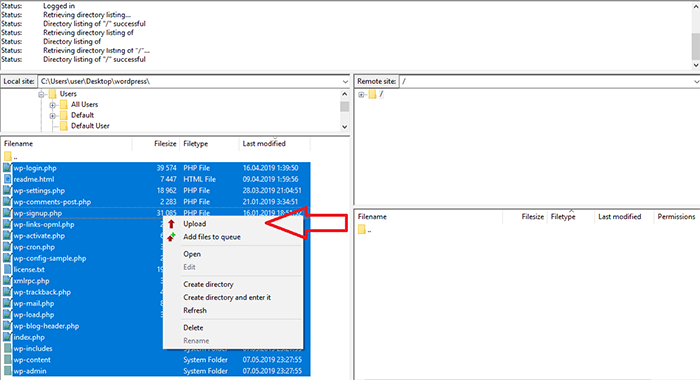
The upload process may take some time. Therefore, just wait for a few minutes.
Open your browser and enter your domain name. If you followed all the previous steps correctly your will see the following screen:

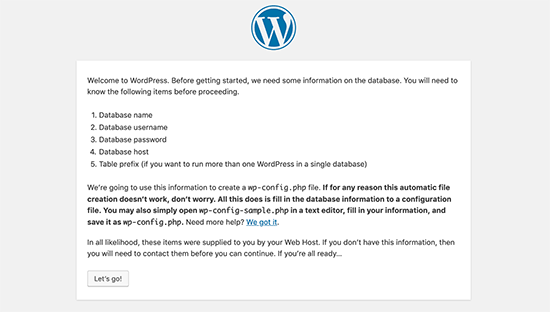
Click “Let’s go” to continue.
On the next screen you will need to enter your database details: database name, password and host.
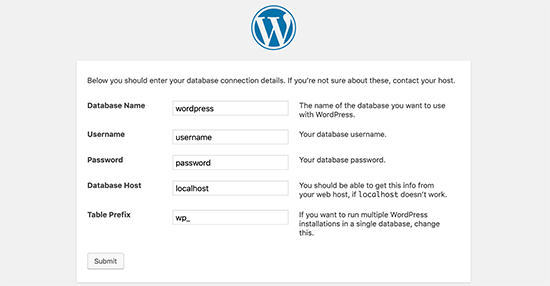
Once you fill in all the information click “Submit” button.
If everything was done correctly, WordPress engine will get connected to your database and show you a confirmation message.
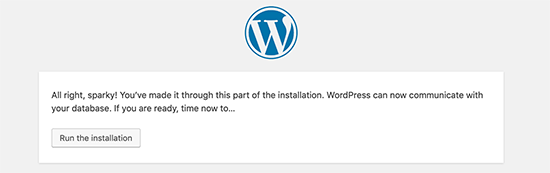
Now just click “Run the installation”.
Wait for a few seconds while WordPress installs its tables into your database. When it finishes, the process you will see the following screen:
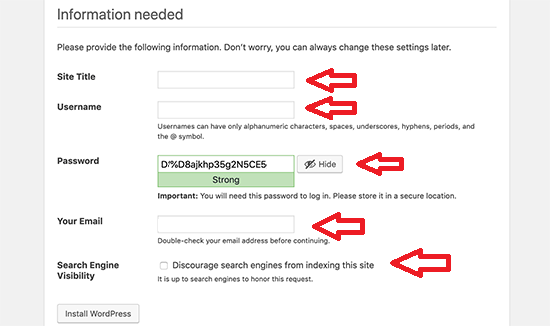
Here you will need to enter your site title, create username and generate password (make sure to save it). Also, you will need to enter your email address and check/uncheck Search Engine Visibility.
The last one means whether or not you want your site to be indexed by search engines like Google or Bing while you still working at it. In fact, you can change this from the WordPress admin panel later on. However, if you are not quite sure, just leave it unchecked.
Click “Install WordPress”. The system will accomplish the installation and setup.
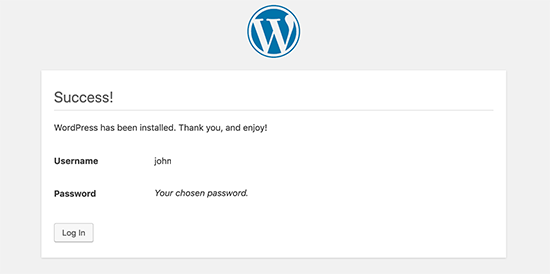
Once done, you will see the final screen confirming a successful installation and your user name. Click “Log in”, enter your login and password and you will be headed to a WordPress dashboard.
Optional Security Step
Find the file wp-config.php on your server and open it. Now, scroll a little bit down and find the security authorization lines:
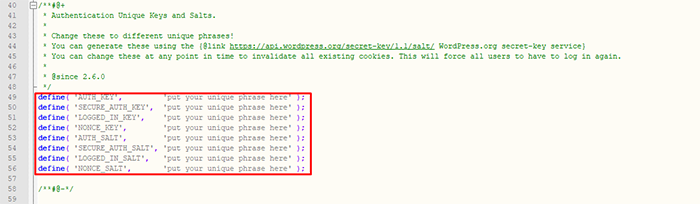

Save changes.
That is it. You’ve just manually installed WordPress with FTP.
How to Install WordPress on Your Local Computer
There are some cases when the user may want to install WordPress on local computer (PC). It can be Windows, Mac or Linux.
The cases are:
- Building WordPress Themes.
- Building WordPress Plugins.
- Test WordPress components before launching online.
In all other cases it doesn’t make much sense to setup WordPress on your Windows or Mac.
Let’s review some steps of localhost WordPress installation on your computer.
WordPress Installation for WINDOWS
Step 1. Launch your local server.
Local server has to run PHP and MySQL databases on your PC. The most popular applications to run a local server on Windows are: XAMPP and WAMP.
You can find a detailed installation instruction for XAMPP here and for WAMP here.
Step 2. WordPress installation on your local server.
Now, when you have your server and database ready, you can proceed with WP installation on your PC. You need to:
- Download WordPress zip from wordpress.org.
- Unzip it in your local server trunk.
- Rename and Edit the file wp-config-sample.php.
- Run the WordPress installer link in your web browser. Usually the link is: http://localhost:8888/mysite/wp-admin/install.php
- Follow Installation instructions.
More detailed instruction how to install WordPress from zip is in previous paragraph.[link up^]
WordPress Installation for MAC
Step 1. Launch your local server.
Installation for Mac is quite similar. However, you will need to use a different software. The most popular local server application for Mac is MAMP. You can download it here.
You can find a detailed MAMP installation instruction here.
Step 2. WordPress installation on your local server.
Once the server is up and ready you can proceed with WP installation on your PC. It is also the same for Windows:
- Download WordPress zip from wordpress.org.
- Unzip it in your local server trunk.
- Rename and Edit the file wp-config-sample.php.
- Run the WordPress installer link in your web browser. Usually the link is: http://localhost:8888/mysite/wp-admin/install.php
- Follow Installation instructions.
More detailed instruction how to install WordPress from zip is in previous paragraph.
How to Install WordPress in a Specific Language
Did you know that you can install and use WordPress in your language? It doesn’t matter whether it’s English (default), Spanish, German, Russian, Arabic, Dutch, or French. WordPress has literally all languages available.
If you’ve just started your WP installation you can choose your language in the very beginning.
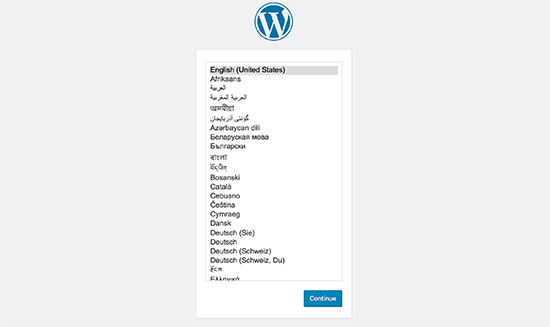
Just pick your language and follow the installation wizard. Some users wonder, how to change the language in WordPress if it has been already installed?
Well, it’s super easy. Just log in to your WordPress dashboard and navigate: Settings -> General Settings.
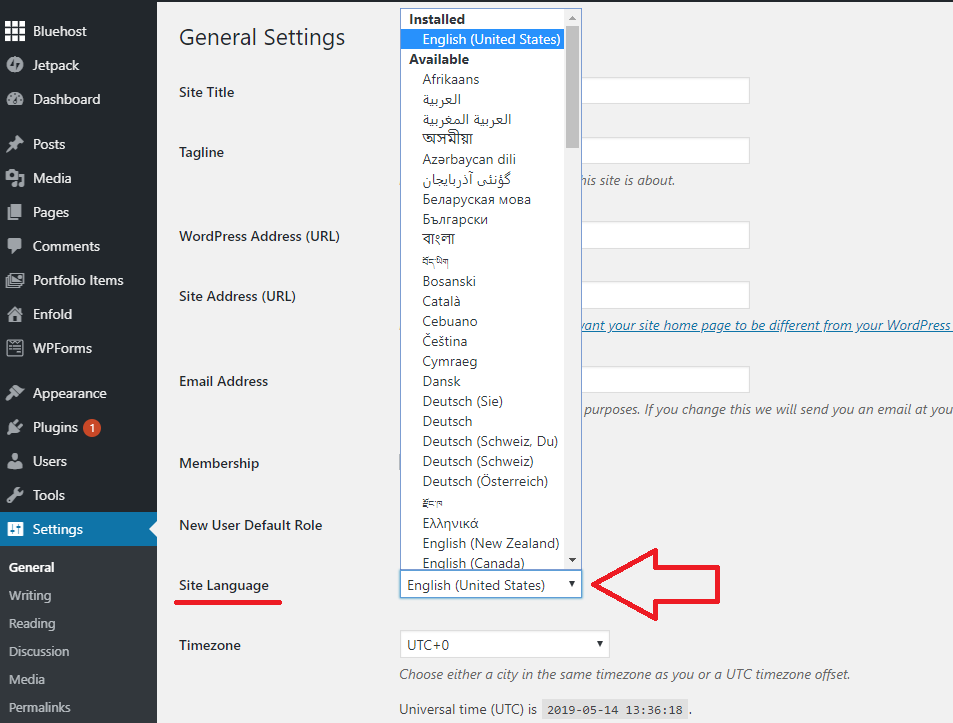
You can find there a Site Language option. Just select your language from the dropdown and save the changes.
That is it, your WordPress language is set.
You may also need to translate the theme and plugins you use. There are great applications that can help you to manually translate themes and plugins using a language .pot file. For example, Loco Translate WordPress Plugin.
Common WordPress Installation Problems
As you can see a WordPress installation process is absolutely simple. Moreover, if you choose a web hosting provider that has a WP auto installing system, there is almost no room for a mistake even for a newbie.
Let me remind the recommended WordPress web hosting providers:
Also, if your hosting provider has any of WP installation wizards like Fantastico, Softaculous, and QuickInstall, it will also help to avoid most of errors.
However There Are Some Common WP Installation Problems.
- Your WP site is malfunctioning. If you install WordPress manually make sure to download the WP application from the official site wordpress.org. Don’t download it from anywhere else.
- Wrong directory. If you want your WordPress to be accessible directly from your domain (for ex. mysite.com), then make sure not to install it in any subdirectories on your server. Though, some companies may want to have the website in subdirectory. In this case they create a folder for it and install it there (for ex. mysite.com/folder/).
- Wrong language. User can choose his/her language during the installation process. Although, if this step was skipped, it can be done after installation in WordPress admin panel: Settings -> General Settings.
- Directory with folders & files instead of a website page. Usually it happens in case your web server either doesn’t see index.php file or is not set to view it. In this case you will need to enable this setting or contact your server provider to do it for you.
- “Headers already sent” error. In most of the cases you will see this error in case your wp-config.php file contains an error. Just open it and fix the errors. In case you cannot find them, simply download a new one and replace it.
- “I see plenty of code with <?php ?> ”. If you see the code with <?php ?> tags, it means that PHP (it runs the backend scripts) is configured incorrectly. In this situation simply contact your hosting provider to get it fixed.
- “Error connecting to database”. It means that WordPress cannot connect to the database you’ve mentioned in file wp-config.php or during installation. It either doesn’t exist or has different credentials. You will need to simply go to your database and get correct credentials.
- “Error connecting to database”. I am positive configs are correct. This error happens seldomly. It may be a backend glitch. Try to reset your user password. It can be done via your hosting control panel or in phpMyAdmin app.
- “Your PHP installation appears to be missing the MySQL extension which is required by WordPress”. If you see this or similar error on your page, make sure to check if MySQL is installed and configured on your server correctly. Also, this error may be caused by wrong configuration file and/or .htaccess file.
If you feel not quite confident, we strongly recommend contacting your hosting provider first before taking any actions.
What Are the Next Steps for Your WordPress Site?
Great! You have your WordPress installed on your web server. Good job!
But there is no time to relax. Here are some further steps for your WordPress site development.
#1. Choose a WordPress Theme
WordPress Theme (sometimes called WordPress Template) defines the look of your site, compatibility with modern Plugins and general site functionality. Therefore, it is crucial to use high quality WordPress Themes.
Obviously, theme frontend has to meet your expectations. It’s basically a main purpose of using WP template. It’s a virtual showcase of your company.
Second of all, it has to be modern and up-to-date. It means that it should be:
- Responsive
- SEO-friendly
- Crossbrowser
- Fast load
- User-friendly
- Gets regular updates.
These features go without saying.
Third, the theme has to provide needed functionality or at least to be compatible with proper plugins. For example, if you are looking for a charity WordPress template, it has to have donations and events management systems. Or if you build a dental clinic site, it would be nice to have an online booking functionality.
The best sources are ThemeREX WordPress themes and ThemeForest.
Here is a detailed tutorial How to Choose a WordPress Theme.
#2. WordPress Theme & Required Plugins Installation
When you purchase and download a WordPress theme you will need to install it. There are several methods of WordPress theme & plugins installation.
Most modern templates and plugins have an easy 1-click installation, but there still can be some tricky moments. Here is the detailed guide how to install a WordPress Theme.
#3. WordPress Theme Customization
Even though a WordPress core is the same in every WordPress website, themes used by site owners can be dramatically different. Therefore, customization may also be significantly different.
However, if you chose a good WP template from a reputable author, it should be quite easy to learn the theme dashboard and customize the overall look of your site.
You may want to start with the following steps:
- Color Scheme (tweak main colors)
- Typography (pick suitable text fonts & sizes)
- Translation (if needed)
- Contacts and Social accounts
- Menu
- Header & Footer
- Homepage
- Subpages
- WordPress Blog (if needed)
Now, you can fill in pages and your blog with content.
If you want to speed up the process of your WordPress site development or simply want to outsource some part of the job, you should definitely consider using ThemeREX Custom Studio.
Basically, they can do literally anything you possibly need for your website. They can provide:
- Theme installation
- Theme customization
- Ready-to-use website
- Complete redesign
- Adding additional functionality
- and much more…
Hope this WordPress setup tutorial was helpful for both beginners and advanced users. Now you know how to install any WordPress Theme. You may also want to check our article How to make a website with WordPress.