
Making updates or major changes directly to your WordPress site can be risky. That’s where a staging site becomes essential.
A staging site is an exact copy of your live site. It allows you to safely test changes, identify issues, and fine-tune updates before they go live. This process helps prevent downtime, broken features, and other problems.
This guide will walk you through creating a staging environment for your WordPress site. We’ll explore different methods, many of which can be done with just a few clicks.
What Is a Staging Site?
A staging site is a duplicate of your live website, used for testing changes before they go live. It helps you catch errors and avoid issues on your main site.
Setting up a WordPress staging site was complex in the past, but now it’s much easier—even for non-technical users.
Some still test changes by installing WordPress locally on their Windows or Mac computers. Once the updates are ready, they upload them to the live server. However, this approach has a major drawback: what if something that works locally fails on the live site?
The issue is that local environments and live servers often don’t run under the same configurations.
Since a staging site operates on the same server as your live website, it allows you to test updates in a more accurate environment, reducing the risk of errors.
Now, let’s explore how to set up a staging site for WordPress.
Methods to Create a WordPress Staging Site
There are several ways to set up a staging site for WordPress, the easiest of which is to use the staging feature offered by many hosting providers.
Top WordPress hosting companies often provide a 1-click option to create a staging site. If your site is hosted with one of these providers, setting up a staging environment is quick and straightforward.
If your hosting provider doesn’t offer this feature, don’t worry—you can still create a WordPress staging site using a plugin or even manually.
1. Creating a Staging Site on Bluehost
Bluehost is a top WordPress hosting provider, offering a simple 1-click staging site feature with all its plans.
To create a staging site, log into your Bluehost dashboard and navigate to the ‘My Sites’ section.
Next, go to the ‘Plugins’ tab and enable the ‘Bluehost Plugin.’
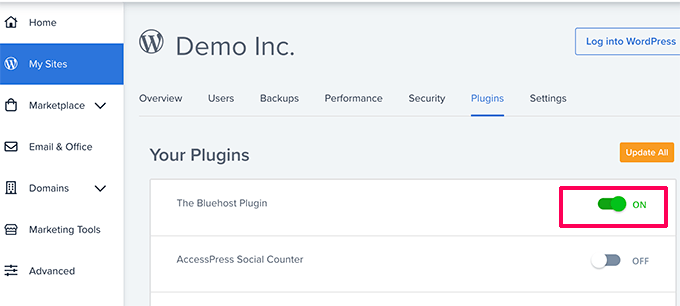
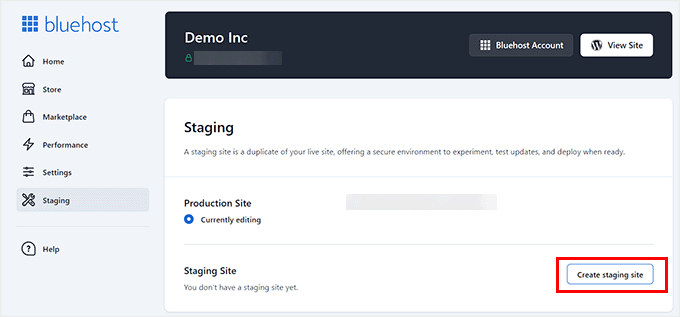
Once activated, head to your WordPress dashboard and select Bluehost » Staging.
Click the ‘Create Staging Site’ button, and Bluehost will set up your website’s staging environment.
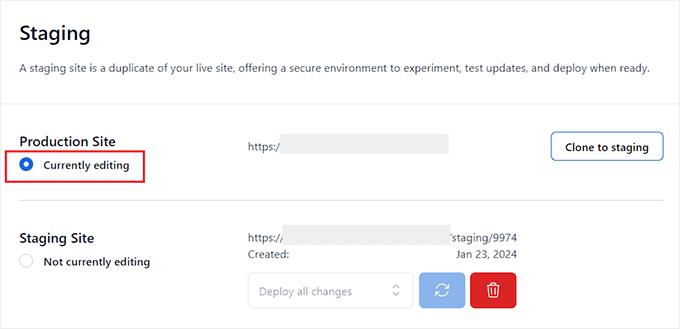
After creating the staging site, check the ‘Not currently editing’ box. A prompt will ask you to switch to the staging site—click the ‘Switch’ button to proceed.

Once switched, you’ll see a notification that you’re now working on the staging site, allowing you to safely make changes without impacting your live site.
Deploying Changes From Staging to Live Site
When ready to push changes from staging to live, go to Bluehost » Staging from your WordPress admin.
In the deployment options dropdown, you can deploy just the files, the database, or all changes. If unsure, select ‘Deploy All Changes.’

Next, click the ‘Deploy Site’ button, and confirm in the popup that you want to deploy to the live site by clicking the ‘Deploy’ button.
Bluehost will begin the deployment process, which may take some time, depending on the size of your site.
Once done, switch back to your live site to see the changes by selecting the radio button under the Production site option.
Cloning Your Production Site to Staging
Remember that changes made on the live site are not automatically synced to your staging site. If you want to test new updates in the future, you’ll need to duplicate your live site to staging.
To do this, go to Bluehost » Staging and click ‘Clone to staging.’
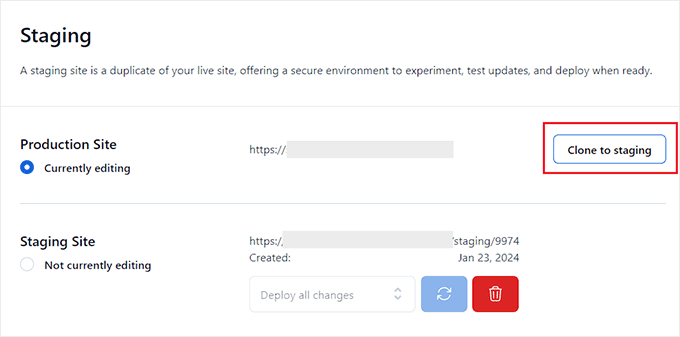
Bluehost will clone the latest changes from your live site to the staging site, allowing you to continue testing and development safely.
2. Creating a Staging Site on SiteGround
SiteGround, another leading WordPress hosting provider, offers a 1-click staging feature with its GrowBig and GoGeek plans.
If your site is hosted with SiteGround, follow these steps to set up a staging site:
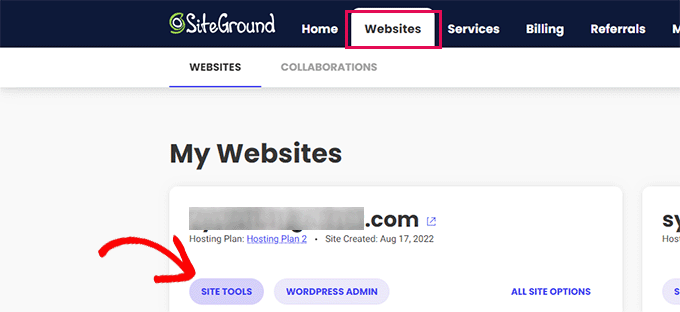
- Log in to your SiteGround dashboard and go to the «Websites» tab. Select «Site Tools» for the website you want to create a staging site for.
- On the next screen, click on WordPress » Staging from the left-hand menu.
- Choose your website and give your staging site a name.
- Click ‘Create,’ and SiteGround will generate a staging copy of your website.
- After creating the staging site, click ‘Go to protected URLs’ to password-protect the site and keep it private.
- SiteGround will pre-fill the URL and path for your staging site. You just need to set a username and password to secure it.
- Click ‘Protect’ to save the settings.
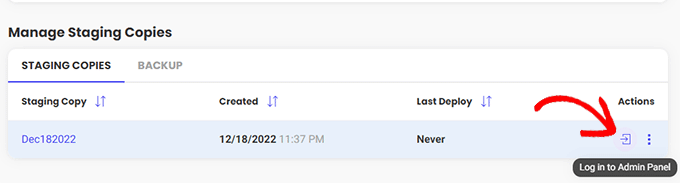
- Finally, go back to the WordPress » Staging page and click the ‘Log in to Admin Panel’ button next to your staging site to access the WordPress admin area and test your changes.
Deploying Changes to Your Live Site
Once you’ve tested your changes on the staging site, you can easily merge them into your live site.
- In the SiteGround dashboard, go to WordPress » Staging.
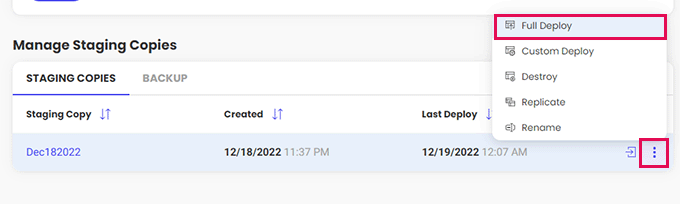
- Click the three-dot menu next to your staging site under the ‘Manage Staging Copies’ section.
- You will have two options: ‘Full Deploy’ (merges everything) or ‘Custom Deploy’ (lets you select specific files or data to merge). If unsure, choose ‘Full Deploy.’
- SiteGround will then transfer the staging site changes to your live site.
Merging Changes From Live to Staging
Updates to your live site are not automatically reflected in the staging site. To work on a fresh staging environment, you must repeat the steps above to create a new staging copy.
3. Creating a Staging Site on WP Engine
WP Engine is a leading managed WordPress hosting provider that offers comprehensive services like updates, backups, security, and performance optimization. One of its standout features is the 1-click staging environment, available across all plans.
If your website is hosted with WP Engine, follow these steps to create a staging site:
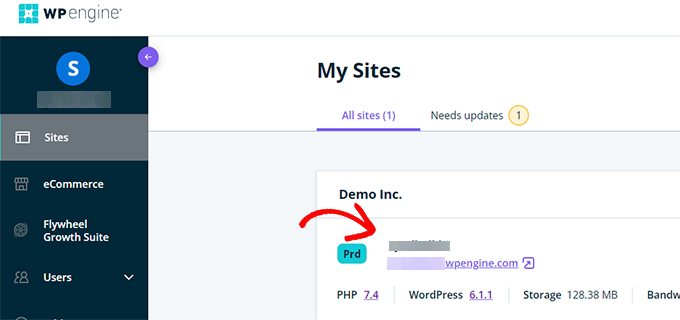
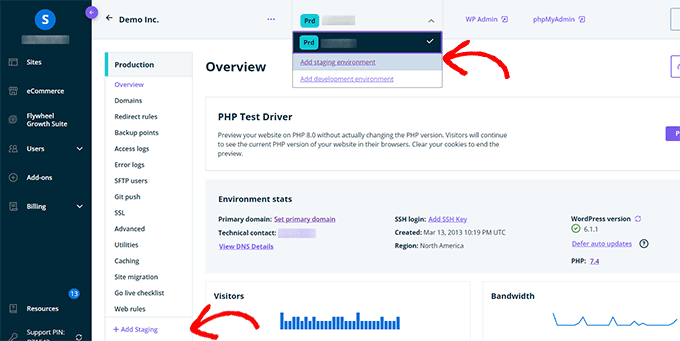
- Log in to WP Engine: Once logged in, navigate to the ‘Sites’ page and select the website for which you want to set up a staging environment.
- Add Staging: In your website dashboard, click on ‘Add Staging’ from the left menu or select it under your site name.
- Choose Environment Setup: On the ‘Add Environment’ screen, you’ll be presented with options for creating your staging environment:
- Start with a blank site
- Start with a guided experience (with demo content)
- Copy an existing environment (such as your live site)
- Move an existing environment
- Start with a WooCommerce site
- To copy your live website, select ‘Copy an existing environment to this site.’
- Select Backup: Choose the latest backup of your live site, then click ‘Next.’
- Name Your Staging Site: Provide a name for your staging site, which will be used in the URL. Select ‘STG’ as your environment type
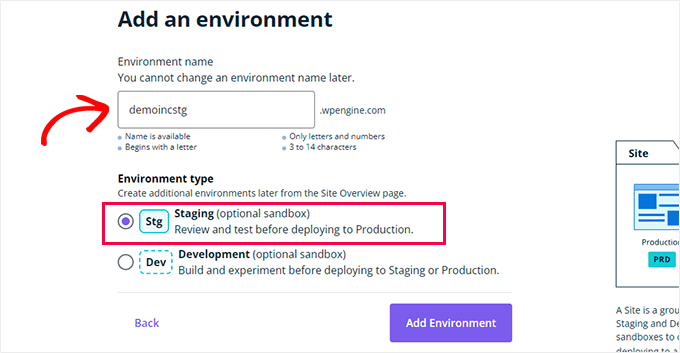
- Create the Environment: Click ‘Create Environment,’ and WP Engine will begin setting up your staging site. Once done, you’ll be directed to the staging environment dashboard.
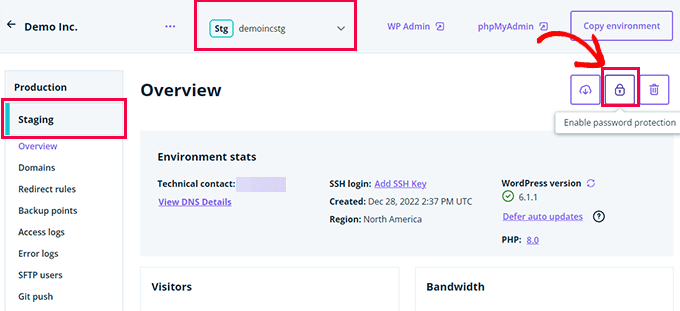
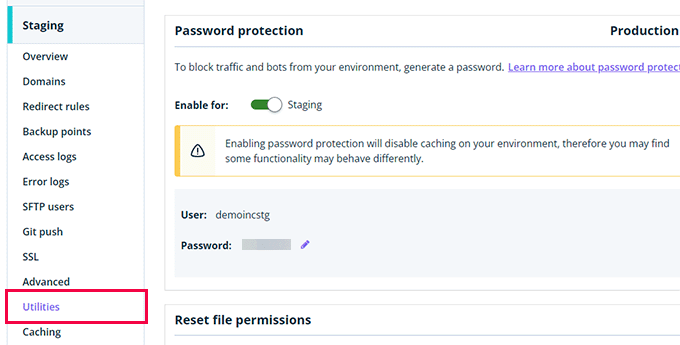
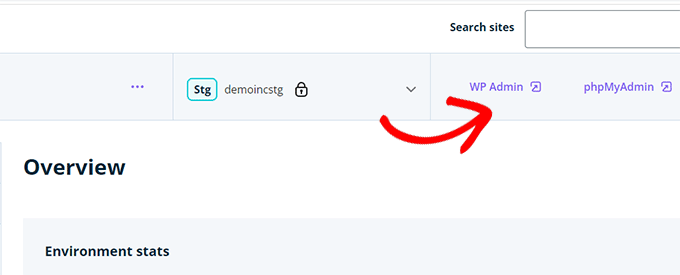
- Password Protection: To secure your staging site, click on the Padlock icon. Then, switch to the ‘Utilities’ tab to copy the staging site’s username and password.
- Log in to Staging Site: Click on the ‘WP Admin’ button at the top to access your staging site, where you can make changes and test new features safely.
4. Deploying Changes from Staging to Live Site
To apply the changes made on your staging site to the live website:
- Copy Environment: Go to your staging dashboard and click the ‘Copy Environment’ button to start deployment.
- Select Source and Destination: On the options page, choose your staging site as the source and your live site as the destination.
- Choose What to Copy: You can select to copy all database tables and files, specific elements, or just the file system. Remember that copying everything will overwrite any new data on your live site, such as posts, orders, or customer information. Always back up your live site before deploying.
- Deploy Changes: Click ‘Review and Confirm’ to start the deployment. The process may take some time, and you’ll receive an email notification once completed.
5. Creating a Staging Site Using a Plugin
If your hosting provider doesn’t offer a built-in staging feature, you can still create a staging site using a WordPress plugin. However, there are some limitations to this approach:
- Limited Server Control: Plugins may not provide the same control over your hosting environment, which can sometimes result in subpar performance.
- External Storage: The plugin stores your staging site on its servers, which could raise privacy or data protection concerns.
- Compatibility Issues: The plugin may not work with all websites, so it is important to review its compatibility list before proceeding.
With these considerations in mind, here’s how to create a staging site using the WP Stagecoach plugin:
- Install and Activate the Plugin: Start by installing and activating the WP Stagecoach plugin.
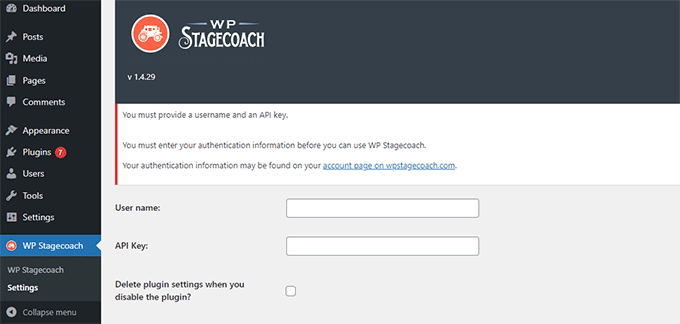
- Access Plugin Settings: After activation, you’ll see a new menu item labeled ‘WP Stagecoach’ in your admin bar. Click on it to go to the plugin’s settings page.
- Enter API Credentials: You’ll need your WP Stagecoach username and API key, which you can find in your WP Stagecoach account.
- Set Up Staging Site: Navigate to the WP Stagecoach page and choose a name for your staging site. This name will be used as the subdomain of your staging environment.
- Be sure to check the option to Password protect your staging site, which will ensure it stays private and is not indexed by search engines.
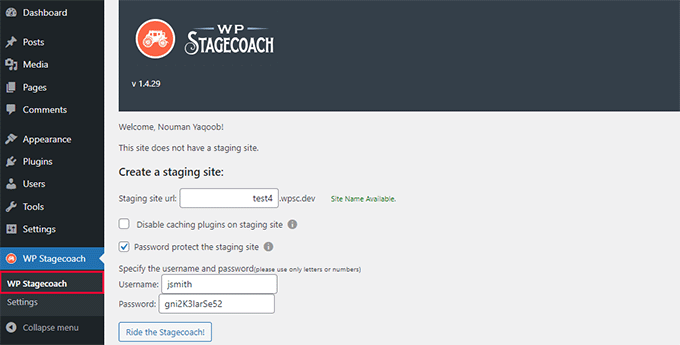
- Create Staging Site: To initiate the process, click the ‘Ride the Stagecoach’ button. The plugin will back up your website files and database and create the staging site. Depending on the size of your site, this process may take some time.
- Access the Staging Site: Once the setup is complete, you’ll receive a link to your staging site and its admin dashboard. You’ll also see a clear message at the top of the admin bar indicating that you work in the staging environment.
Deploying Changes from Staging to Live Site
When you’re ready to move changes from your staging site to the live site:
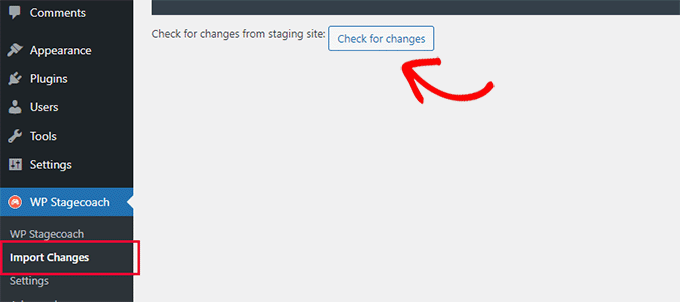
- Check for Changes: Head to WP Stagecoach » Import Changes and click the ‘Check for Changes’ button. The plugin will scan for any updates or modifications on the staging site.
- Select Changes to Import: Depending on your needs, you can import all changes, only file changes, or just database changes.
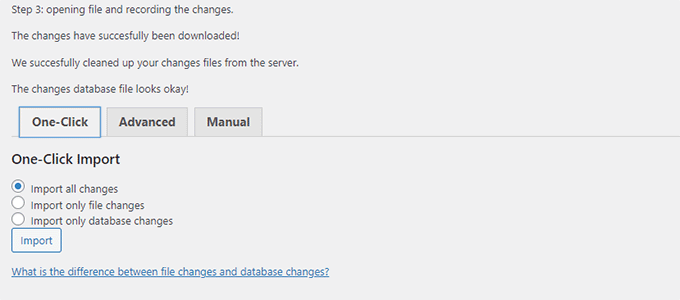
- Import Changes: The plugin will import the selected changes and show you the progress in real time. Once it’s finished, you’ll be notified.
- Test Live Site: After the import is complete, it’s a good idea to thoroughly test your live site to ensure all updates have been successfully applied.
6. Manually Creating a Staging Site for WordPress
Here’s how you can manually set up a staging site for your WordPress installation. This approach is more suited for advanced users, as it requires additional effort compared to the above mentioned methods.
One drawback of this technique is that your site will experience downtime when transferring changes from the staging site to the live server.
With that in mind, let’s walk through the steps to create a staging environment for your WordPress site manually.
The first step is to create a subdomain for your staging site. If you’re using Bluehost, log in to your hosting account, navigate to the ‘Advanced’ tab, and locate the subdomain options.
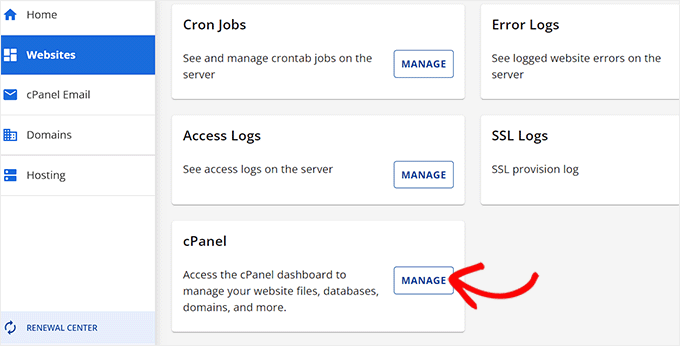
Then, select the ‘Manage’ button next to the ‘cPanel’ option.

This action will open the cPanel in a new browser tab. Once there, scroll down until you reach the ‘Domain’ section.
At this point, select the ‘Domains’ option.
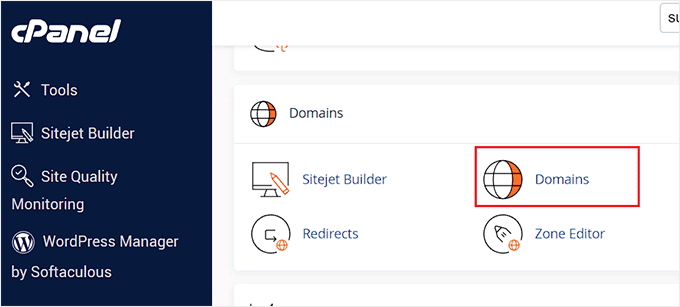
This will display a list of all the domains associated with your hosting account. To create a new domain, click on the ‘Create a New Domain’ button.
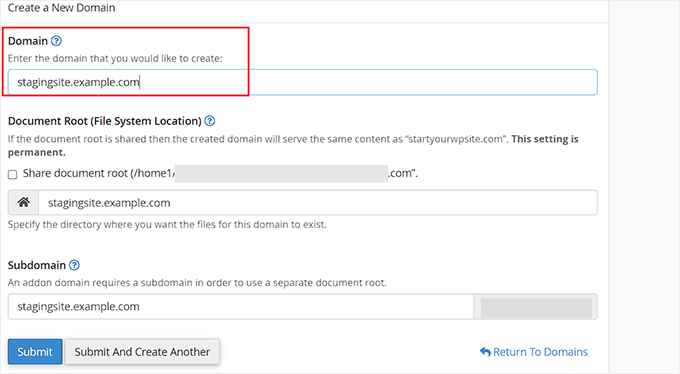
Afterward, a new page will appear where you’ll need to enter your subdomain along with the main domain in the ‘Domain’ field, formatted like this:
subdomain.example.com
Once completed, click the ‘Submit’ button to save your settings.
Note: The screenshots in our example use Bluehost, so your interface may appear slightly different.
Your hosting control panel will now create the subdomain, which you’ll use to clone your live WordPress site.
The next step is to install and activate the Duplicator plugin on your live site. To access all its features, consider upgrading to the premium version of Duplicator.
Once the plugin is activated, go to the Duplicator menu in your WordPress admin sidebar and select the ‘Create New’ button under the Packages section.
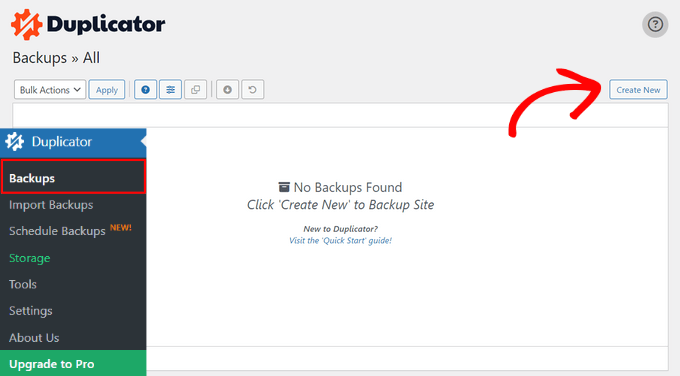
Next, you’ll be prompted to click the ‘Next’ button to proceed. Duplicator will then launch its website duplication wizard.
It will begin by running a series of tests to ensure everything is set up correctly. If all items are ‘Good,’ simply click the ‘Build’ button to move forward.
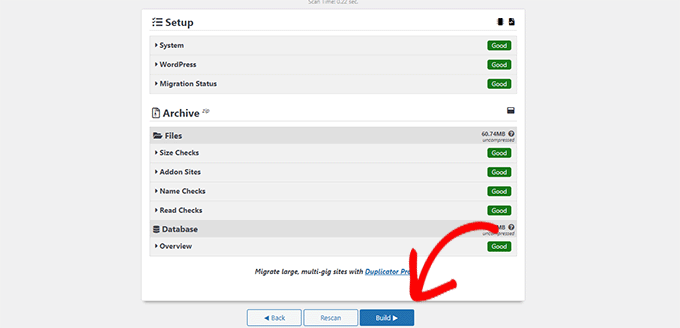
The plugin will now begin generating a Duplicator package for your WordPress site. The time it takes will vary depending on the size of your site and could take a few minutes.
When the process is complete, you’ll see download options for both the Installer and Archive package. Click the ‘Download Both Files’ button to save both files to your computer.
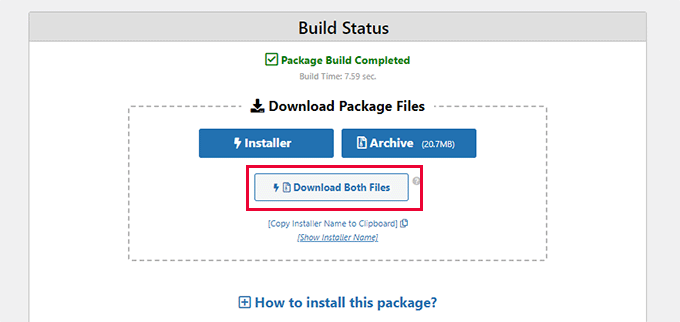
You’ll need to upload both of these files to the file directory of the subdomain you’ve just set up. For detailed instructions, refer to our guide on uploading files to your WordPress site using FTP.
Next, you must create a new database for your staging WordPress site. Let’s get started.
Log in to your hosting account’s control panel and navigate to the ‘Advanced’ tab.
Then, scroll down to the ‘Databases’ section and click the ‘Manage’ button.
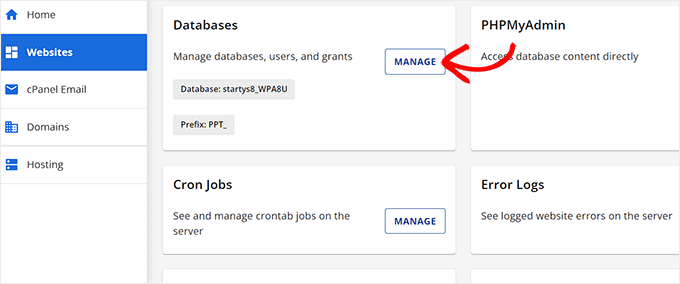
If you’re not using Bluehost, your hosting control panel might look slightly different. Don’t worry—just locate the Databases section.
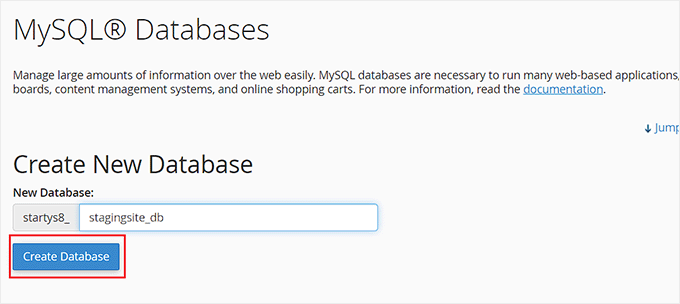
This will lead you to the ‘MySQL Databases’ page, where you’ll begin by entering a name for your new database.
After that, simply click the ‘Create Database’ button.
Next, you’ll need to create a MySQL user for your database.
Scroll down to the MySQL Users section and enter a username and password for this new user.
Now, you must grant this user permission to access and manage the database you created earlier.
To do this, navigate to the ‘Add user to database’ section, then select the database and the user you just set up.
Once selected, click the ‘Add’ button to proceed.
You’ll then be prompted to choose the user’s privileges. Check the box for ‘All Privileges’ and click the ‘Make changes’ button to finalize the setup.
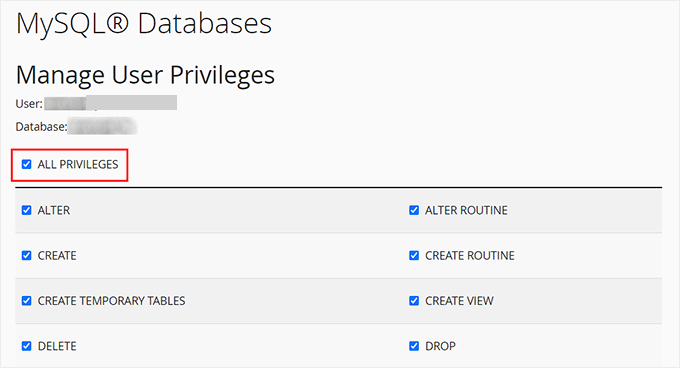
Your database is now set up and ready for your staging website.
Next, open a new browser tab and type in the subdomain for your staging site, formatted like this:
https://yoursubdomain.example.com/installer.php
Please replace » your subdomain» with your actual subdomain and «example.com» with your own domain name.
This will initiate the Duplicator installer wizard.
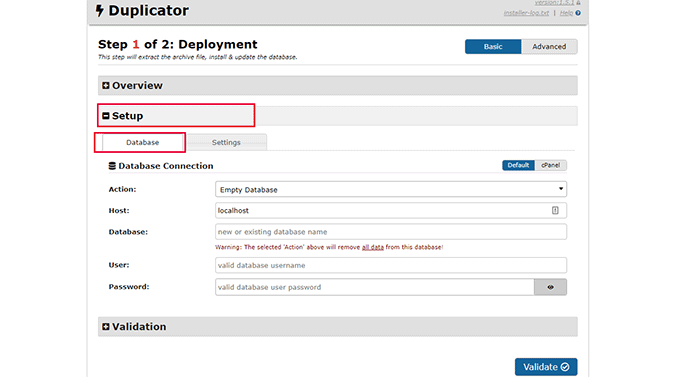
The installer will prompt you to input your WordPress database information in the’ Setup’ section.
Your host will typically be set to localhost. Next, enter the details for the database you created earlier for your new domain.
Click the ‘Validate’ button to ensure Duplicator can connect to your database successfully.
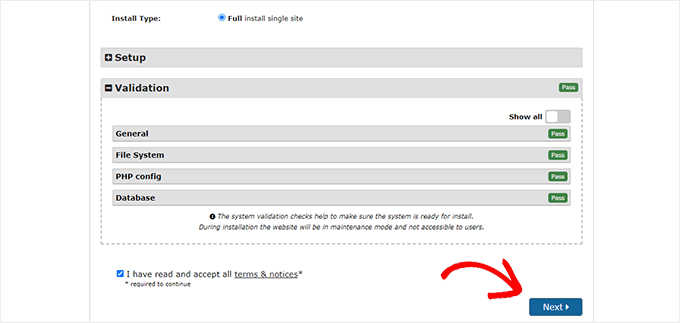
After that, click the ‘Next’ button to proceed.
Duplicator will now extract your WordPress database and files, transferring them to your staging site.
When the process is complete, you’ll see a success message.

You can click the ‘Admin Login’ button to access the WordPress admin panel on your new staging site.
With your staging site now ready, you can enhance its security by adding password protection to the subdomain.
Go to your hosting account’s dashboard and navigate to the ‘Advanced’ tab.
Next, scroll down to the ‘cPanel’ section and click the ‘Manage’ button beside it.
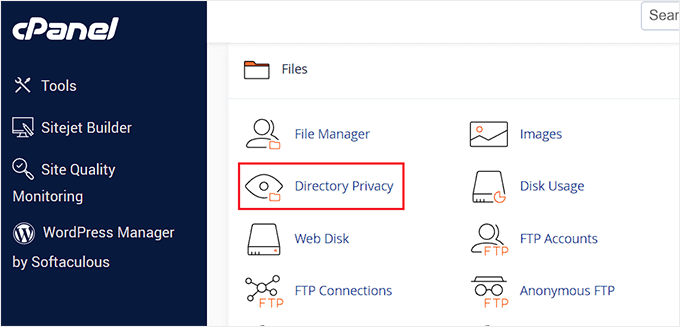
This action will open cPanel in a new window. Once there, scroll down to the ‘Files’ section.
From this location, click on the ‘Directory Privacy’ icon.
Next, choose your subdomain folder and check the option ‘Password protect this directory.’
You’ll be prompted to enter a name for this setting, after which you can click the ‘Save’ button.
Once you complete this step, your staging site will be secured with password protection, preventing it from being indexed by search engines and keeping it private from public view.
Now, you can work on your staging site and implement the necessary changes.
Manual Deployment of Staging Site to Live
When you’re ready to transfer changes from your staging site to the live server, follow the same procedures outlined earlier.
Start by creating a new Duplicator package on your staging site and downloading the Installer and Archive files to your computer (refer to the earlier instructions).
Next, navigate to your live site and create a complete backup of your WordPress installation (Duplicator can also be used for this backup).
Once your backup is secured, you must remove all WordPress files and folders from your live website, temporarily taking your site offline.
Finally, run the Duplicator installer wizard described earlier to import your staging site to the live server.
As noted, this method isn’t ideal. Several steps in the process could potentially harm your site.
We recommend steering clear of this method unless necessary. Instead, consider using a reputable hosting provider like Bluehost, SiteGround, or WP Engine, which offers built-in staging site features for smoother deployments.