
Nowadays, busy life makes people not to have much time for learning, improving knowledge. This is also the reason why the online learning website is increasing due to its advantages of saving time and costs for students. We will talk about creating a WordPress school website using Education WordPress Themes.
It is the fact that almost all educational institutes need to have their website. An attractive web page can help them to promote their school, provide all critical information about the institute, the course, educational environment, etc. Most of them use WordPress for a school website. Besides, this online platform is also a reasonable place for you to offer and open up alternative learning opportunities such as online courses to the audience.
Consequently, the need for having an amazing educational/school website is becoming more popular. Are you looking for a site like this? Congratulation! You arrived at the right place.
In this post, I will give you an essential guide step-by-step to create an online school website for your institute, school, university. But first, before we start, you need to clarify which type of website you want to create:
- A School or College Website where you give the information about your school, students, teachers, courses, and classes.
- An Online Education Portal where you offer study materials, live classes, and tutorials for your students.
- A Membership Website for Education where your students have an account and can log in, take online classes, keep track of their grade, and submit assignments. Instructors can create courses in an online and offline platform and monitor their students.
- Or a website combining all of these above types.
So which type are you looking for?
What Do You Need In A School Website?
These are some of the elements that most of the online school websites have in common.
- Home Page – This is the first impression when visitors look at your website where you can put all necessary information such as logo, images, important notices, and events information.
- About Page – You can show all the information about your institute/school/university on this page such as the history of your school, location, certifications, rewards, etc.
- Courses Page – On this page, you can give detailed information about the courses your institution offers.
- Faculty information – On this page, you can display information about the faculty of your institution, the teachers and team members.
- Registration form – You should include a registration form for visitors who want to register for your courses.
- Contact form – You also need to attach a contact form where students/users can send messages to you directly through the website.
Now, it’s your turn to think about the information and elements you want to create and include in your school website. Be careful with the information on the website which will grow the reputation and recognition of your institute. If you do not have yet, do not worry, you can think about it and add later.
Let’s create a school website!
Nowadays, there are many website platforms for you to choose such as WordPress, Joomla, Moodle… In this tutorial post, I will go for WordPress due to its huge advantages. A well-structured website with interactive quizzes and Microsoft MS-102: Practice Test Dumps can attract aspiring cloud professionals looking for study resources.
- WordPress is a cheap platform to start a website. With just a small amount of money (even at no cost), you can create a professional-looking website with fully functions for your educational institute.
- You don’t need to hire a professional in the coding or programming field! WordPress is pretty easy to use. Trust me, when you finish reading this topic, you will understand all the steps and can be able to build you one.
- With WordPress, you can get your educational website ready in an hour. I will guide you to do it right away.
Basic Steps To Create an Educational Website
Step 1: Choosing the domain name for your educational/e-learning/school website.
Step 2: Registering the domain name and choosing a hosting plan.
Step 3: Choosing and installing a website platform (WordPress).
Step 4: Installing a nice, attractive, and responsive WordPress theme for your educational website – Customizing the theme to create a desirable and attractive looking.
You might also use a WordPress theme detector to find inspiration or check out the themes used by other educational sites. Customize the theme to create a desirable and attractive look.
Step 5: Downloading and installing relevant LMS plugins for the school website
Step 6: Adding and editing content and information.
Now, I will show you step-by-step.

Step 1. Choosing the Domain Name for Your Educational, School Website
The first step to create a website is creating a domain name for your website. The domain name is the address of your website. That means your website, when being published on the Internet, needs to have some information for the user to call or enter to access. Visitors only need to remember the domain name when they won’t have access to your website. Each domain name can only belong to one website.
Besides, with an online school website, the domain name is where you can identify your brand and represents it. Choosing it for your website is not too difficult. The name of your school, college, educational institution or educational portal itself can be good options for the domain. But, you should quickly to register for a domain name before it is felt into your competitors’ hands.
After having your own domain name, you need to check that the name exists or not. Go to www.namesilo.com to check the availability. Enter the names in the search box.
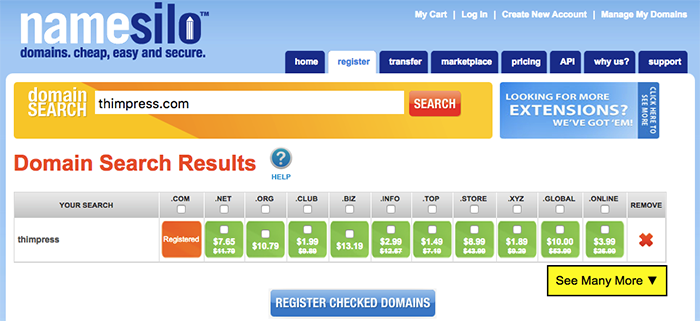
You can see the result with different tails after the dot (.com, .net, .org, etc). If you find your domain name at Namesilo, do not register it there. I will show you how to get a domain name even for free in the next step.
If you want to get “.edu” for your domain name, you can register at EduCause (for US institutions) or ccTLD (for institutes in other countries). But the “.edu” domain is limited to accredited degree-granting institutes of higher learning.
Step 2. Registering Domain Name and Choosing Hosting Plan

Besides domain name, hosting is a compulsory factor to launch a website. Hosting is a space where you can store content, images, data, and shortcode, etc. It can be divided into several categories based on technical parameters, typically referred to a dedicated web hosting (using a physical server to run the website), VPS hosting (using a virtual server to run the website), and the weakest of that power is shared hosting
There are many web hosting companies that offer you large storage and bandwidth. But the cost for them is significantly remarkable. A web hosting service allows you to display the website on the Internet. Therefore, you must choose a reasonable web-hosting plan. For those who are newbies, I highly recommend using a shared plan due to its lower price and convenience.
There are many hosting companies for you to choose from. You can select from companies such as Hostinger, SiteGround, inmotion, GreeGeeks, Resellerclub, etc.
In this blog, we will use SiteGround for the tutorial because it is relatively cheap, reliable and ready for WordPress.
- Offering free domain.
- Being officially recommended by WordPress.
- Having uptime of 99.99% => the website will always be accessible.
- Having a 24/7 support service.
- Fast web host using SSDs on the server and providing fast speed at lower prices compared to other services.
- Offering free SSL certificate (Https) which makes your blog trustworthy.
To get SiteGround’s web host and a free domain, please follow steps as follow:
- Go to SiteGround.
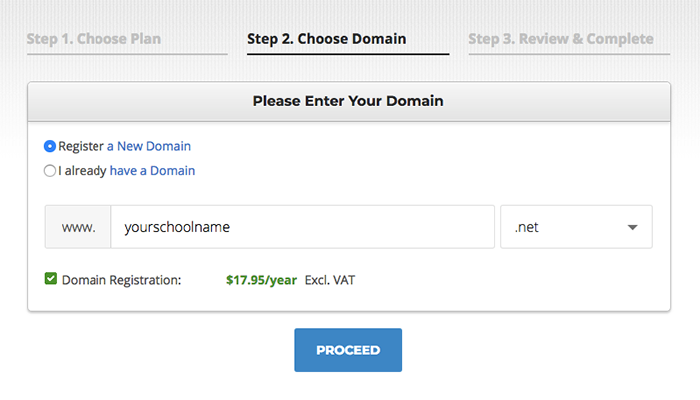
- Choose StartUp plan (recommended for beginners)
- Select register a new domain, enter the domain name you just chose after looking at Namesilo and click Proceed
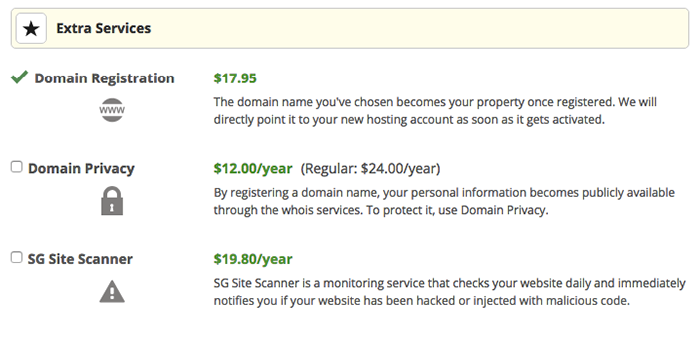
- Fill in all information about your name, address, email address, payment information
- Please remember to check the Domain Privacy in the Extra Services section. Your personal information about name, address and phone number needs to be protected.
Step 3. Install WordPress
As I mentioned above, in this tutorial, I will use WordPress as the website platform to build the educational website due to its convenience to use.
WordPress is a great platform for creating any sort of educational websites and an excellent content management system. You can create a fully functional website without ever understanding a single line of code and that too for FREE. And, creating an educational website is super easy with WordPress.
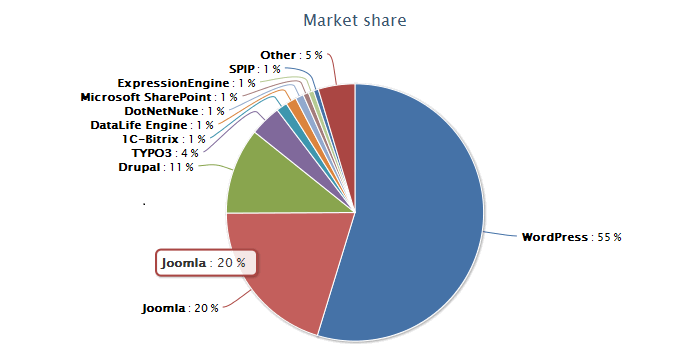
In recent statistics made by W3Techs, WordPress is the most popular content management system (55%) followed by Joomla (20%) and Drupal (11%).
So, the next step of our process is to install WordPress. You have 2 ways to do this. Firstly, you can download it through your hosting service. Once you register your hosting, you can install WordPress with just a few clicks.
- Login to your SiteGround account. Check your email for the login info. You get an email with login instructions after you successfully register at SiteGround.
- Follow the instruction by SiteGround, and your WordPress website will be ready in a few steps.
Secondly, you can download manually. If there are some reasons that you cannot download WordPress automatically (the hosting companies don’t offer one-click-install for WordPress), look for this guide step-by-step:
- Go to https://wordpress.org/download and download WordPress
- Create a new folder on your desktop and unzip WordPress in it
- Find a file named wp-config-sample.php and change the name into wp-config.php
- Open the file wp-config.php (with notepad) and fill the following lines:
- define(‘DB_NAME’, ‘database_name_here’); – Database name (if you don’t know it, ask this from your hosting support)
- define(‘DB_USER’, ‘username_here’); – Your hosting username
- define(‘DB_PASSWORD’, ‘password_here’); – Your hosting password
After you finished, save the file.
- Log into your hosting FTP (download FileZilla for that). The FTP address is usually ftp.yourschoolname.net, username and password are the same as the one you used to register to your host.
- If there is any file named “index” – delete it. After that upload all the files from your WordPress folder to your FTP server. I believe you can use the “drag-drop” function in FileZilla.
- Once you have completed the previous steps, go to the URL: yourschoolname.net/wp-admin/install.php
Just fill in the forms and you will have your website.
Now, your website is ready for you. It’s your turn to focus on its design and functions to make it become an educational/e-learning/online school website.
But before you go, you need to access to admin panel of your site to set up the link.
Type yourschoolname.net/wp-admin on your web browser to access the admin panel of your WordPress. Log in with your username and password.
After logging in, you will be directed to the WordPress Admin Panel where you can personalize, edit your website and add pages and posts.
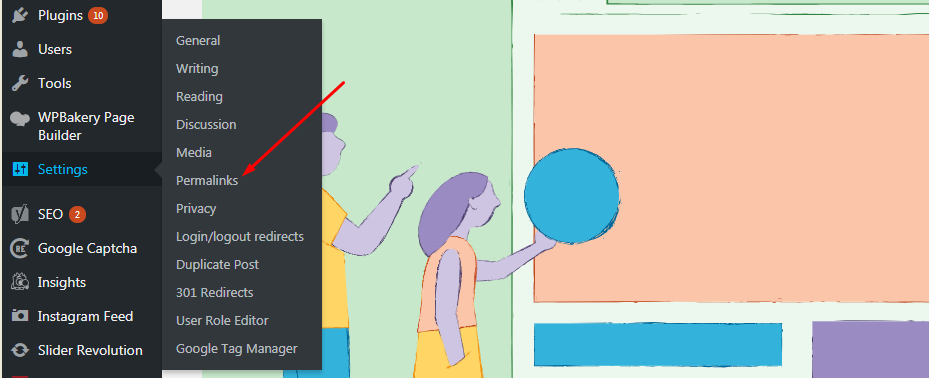
On the Dashboard, go to Settings and click on Permalinks.
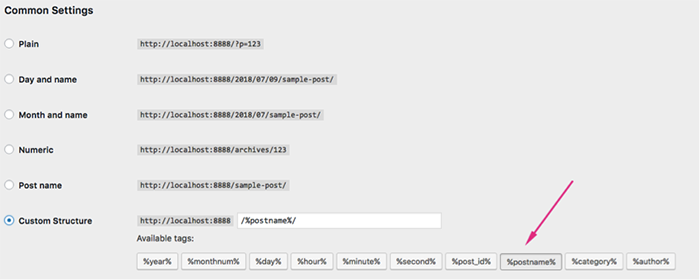
Then in the Custom Settings, select “Post Name” and click Save Changes. This is a necessary step to create your URL’s readable.
Step 4. Installing a Beautiful, Attractive WordPress Theme for Your Educational Website
With WordPress, it is very easy to change the design, layout, and appearance of your website with a pre-made template (theme). Your mission is looking for a good theme that perfectly fits your requirements for your site. Then install it in your WordPress Dashboard, your website will look more beautiful and attractive.
Before you install any theme, here are a few things to look for while choosing a WordPress theme.
- Design: The layouts and designs of the theme are important factors affect the impression of visitors. You should choose the theme that looks clean with beautiful and professional designs and suitable for an educational website.
- Features: Many themes have pre-made features for an online school website. You should choose the one you believe that it will make your site more professional. But, remember to read all the reviews about the themes to get the best one.
- Responsiveness: One of the most important things is that the theme should be responsive. That means it should be optimized to fit any type of devices from desktop to tablet or even mobile phone. I believe that you do not want to miss any audience on any platform.
- SEO Ready: If a theme has Search Engine Optimization (SEO) ready, your website will have opportunities to get a higher ranking in Google Search results. Thus, your website will attract more visitors. To check if a theme is SEO ready, go to Validator and paste the URL of the theme. If a theme has many errors, avoid the theme. A theme with few errors is better for SEO.
- Support from the theme-maker: This sometimes just applies only to premium themes. When you buy a premium theme, check how the team supports other customers.
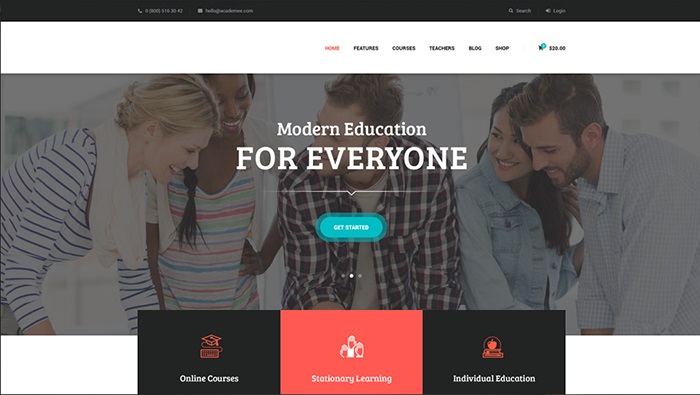
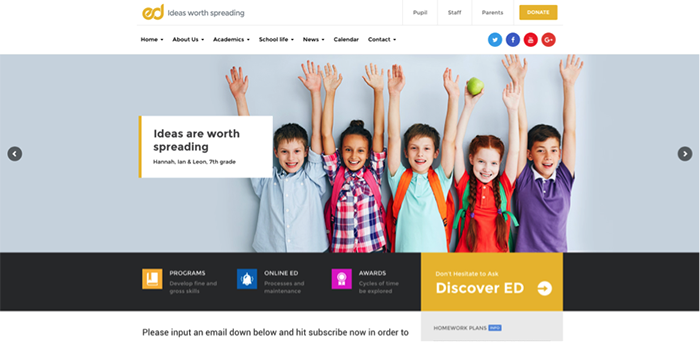
Follow these notes, many FREE themes can have the basic functions for an online school website. For example:
Education Pack
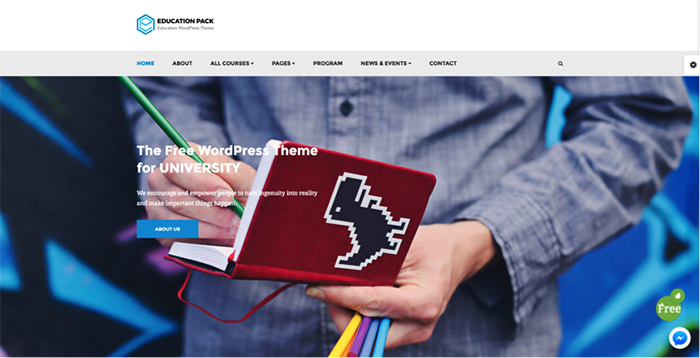
Education Pack is the best free education theme for WordPress. For a freebie, it comes with many features and functions that perfectly fit for an educational website. The theme includes a built-in slider that allows you to organize your site with style. Sliding widgets and parallax background will help you to connect with other current partners. The theme is also linked to Twitter – the largest social network. You can share all your Twitter updates via a widget on the homepage. Besides, custom testimonials and gallery layouts also make your site more popular and amazing.
Education Hub
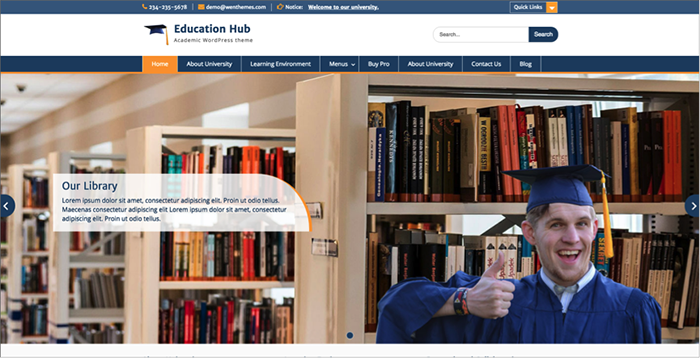
Education Hub has both free and premium versions. This is a clean and beautiful WordPress theme for college, school, university, and other educational institutions. The theme comes with a Theme options panel which is easy to use and highly customizable. The search bar included in the theme helps you to quickly find necessary contents in the site. Besides, the Education Hub is responsive-ready. That means the theme is suitable for any electric devices from desktop to mobile phone.
Academica
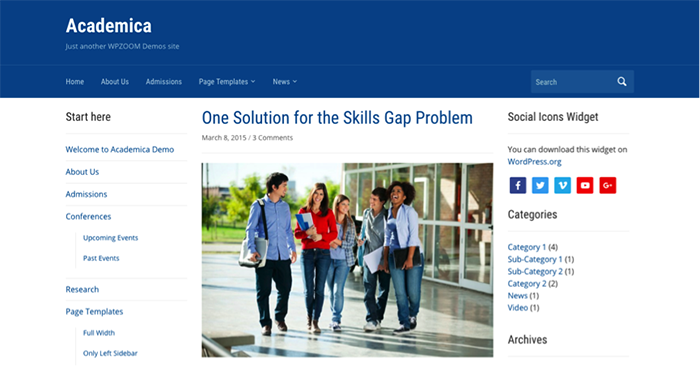
Academica is education and school-oriented CMS theme. It has a modern design and a three-column layout. Besides, Academica has several templates for both pages and posts: Full-width, Sidebar on the Left, Sidebar on the Right. The custom header of Academica allows you to add an image to the top of the header. Similar to other free education themes, it comes with the Retina-ready and mobile-friendly features. More than that, mobile users can easily navigate your site thanks to the integrated sliding menu. Especially, this template comes with the Live Preview Customizer to help you have look and feel of all the settings and changes before applying them. After choosing the theme, you must download them to your desktop. When the theme is ready, please find a zip file for installing and upload to your Dashboard. You need to make sure that you choose the right zip file to install.
After determining the file, you need to login to your WordPress Dashboard by going to the admin URL link.
Then, go to Appearance/Themes and click button Add New. You can also have 2 ways to install the theme.
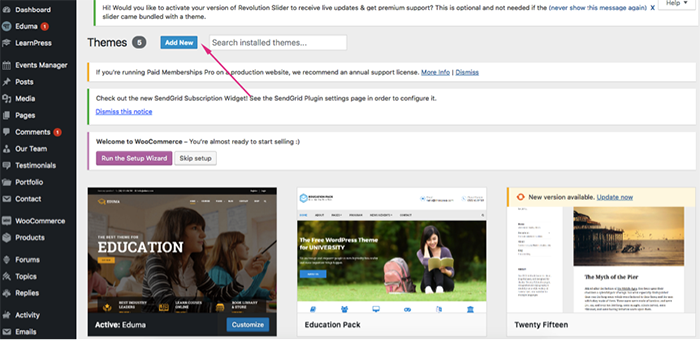
First, after clicking Add New, you will see a list of WordPress themes. You can search for the theme you want in the search bar. Then click Install. The theme will be installed on your site.
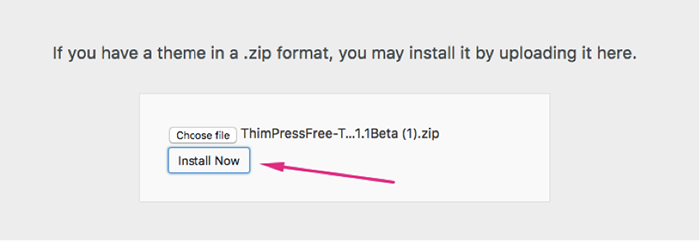
Secondly, you can have the theme by uploading the zip file of the theme. After clicking Add New, click Upload Theme to upload the theme to your site. Then click Choose File and select the file. Remember to choose the “.zip” file. Then, click Install now after the theme is successfully uploaded.
After installing by anyway, click Activate to make the theme go live with your educational site. Congratulations! From here, you will have a website with educational looking. But it’s not finished yet, you need to customize the themes and build your official website based on the pre-made content from the demo.
Besides free themes, there are tons of premium WordPress themes that you will find better for your sites. Here are some of them:
Education WP – Eduma
If you want to create an excellent website that is dedicated to learning, this theme can be your greatest ally. Coming up with 15+ demos, Education WP with a streamlined, practical design will surely attract many audiences to your side. No coding or programming knowledge is required to edit and set up the theme. Education WP also includes the number of premium features, which were added free of charge. By choosing to install this product, you will save up to $400 to use the best LMS plugin – LearnPress and bundle of premium add-ons for it. They allow you to create courses with lessons and quizzes and sell the courses online. After completing the study, students can receive the certificates for the courses… Besides, the theme is responsive-ready so that students can access your site from any device such as desktop, laptop, tablets, and smartphones. With Education WP, it’s all on your hands. Why do not try with this premium theme?
Course Builder
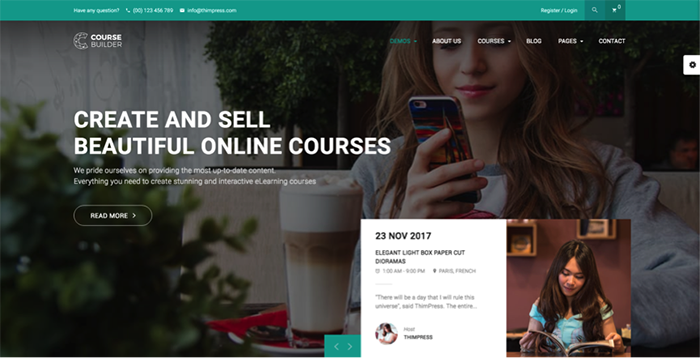
Besides Education WP, Course Builder is also a solid theme for creating an educational website. The theme comes with the bundled Visual composer plugin allowing you to edit your website easily. There are many pre-built demo layouts available for you to install on the sites. Similar to Education WP, Course Builder also has LearnPress plugin and bundle of premium add-ons for an educational website. They are the real stars of the show in Course Builder. What’s more, you have the option of selling subscriptions to your courses using the included PaidMembership Pro add-on. On the whole, Course Builder is a flexible, user-friendly and practical theme for anyone looking to create a smooth-running educational website.
Academee – Education Center & Training Courses WordPress Theme
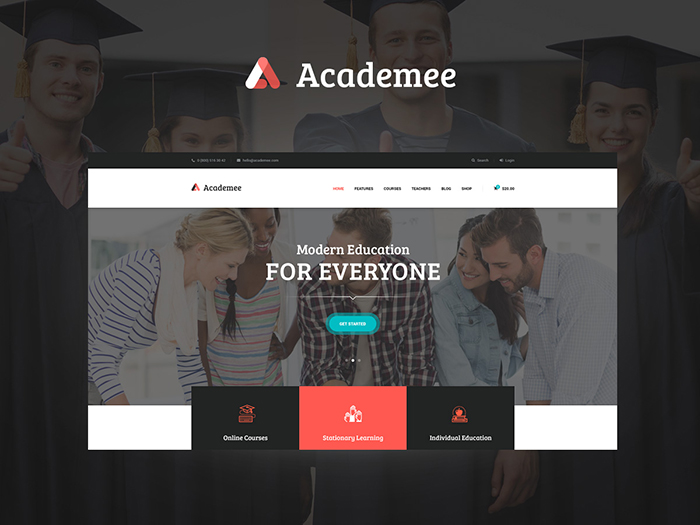
Academee is one of the bestselling WordPress themes for education centers, training courses, colleges, and schools. Created by ThemeREX team, this premium WordPress theme is characterized by the trendy and clear look and is built on WPBakery (aka Visual Composer), that will help you configure and customize it easily. Academee supports various plugins such as Essential Grid, Revolution Slider, etc. Woocommerce is another cool feature of the theme, so you’ll have the chance to add an online store to your school website.
Reign BuddyPress Theme

A newly introduced and fully-featured multipurpose WordPress theme, Reign BuddyPress Theme provides features to help you create almost any niche based website. It is a fully responsive, SEO optimized and RTL ready theme that comes with endless customization possibilities. With this theme, you can easily create a school website with all the required features without any coding skills. Moreover, with dedicated support for the BuddyPress plugin, you can include a social community feature to your school website.
Reign Theme also comes with dedicated Design Template add-ons for two most popular WordPress LMS plugins, LeanDash and LifterLMS. You can also directly purchase LearnMate LearnDash Theme which includes core Reign theme and LearnDash add-on or LeanMate LearnMate LifterLMS theme which is a combination of Reign theme and LifterLMS addon to create a robust LMS with many engaging features such as:
- Engaging Course Review Module
- Attractive Course Coming Soon Module
- Distraction-Free Reading Environment
- Personalized Related Course Module
- Clean Grid And List Layouts For Course Listing
- Unparalleled Course Page Layout
- Easy To Use LifterLMS and LearnDash Extra Widgets
- Dedicated Pages For LearnDash and LifterLMS
Furthermore, with WooCommerce integration, you can also effectively sell your courses online. It also offers integration for other popular plugins like Elementor, Gutenberg, Easy Digital Downloads, Paid Membership Pro.
Divi
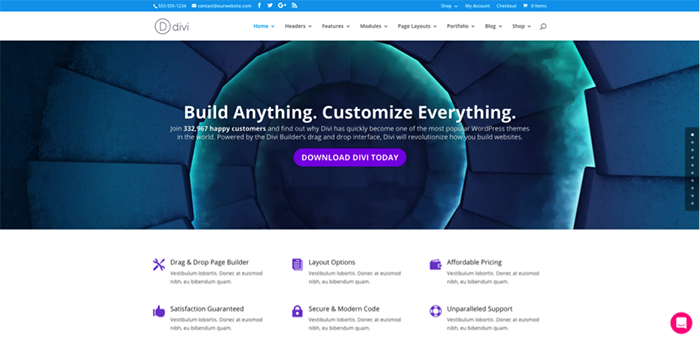
Divi is a WordPress theme that can accomplish both objectives of creating an engaging, informative website but still being beautiful and attractive. The theme has a large roster of versatile features, in addition to a layout that is fully responsive so that Divi is compatible with any device or web browser. This template comes with 20 pre-made layouts for you to choose from for your sites. Divi turns site elements into visual building blocks, making it easier to customize your web page. And of courses, like another pre-made theme, no coding knowledge is required for using the theme, as the process is highly intuitive. The Divi website hosts several examples of site demos, which were crafted by other users. Be sure to check them out.
Ed School
Ed School is a kids’ and adolescents’ WordPress theme that specializes in education. Including Drag & Drop’s Visual Composer, it’s all in your hand to easily set up and edit the theme. Many specialized plugins are also included in Ed School such as Revolution Slider, Contact Form 7 and Tribe events. This theme has a responsive design adaptable to all screens and devices. It comes up with many widgets for social media sharing. Ed School theme does not require any coding or programming skills. Furthermore, WooCommerce integration for special product shops is also available. Try this ingenious tool with one click!
WPLMS
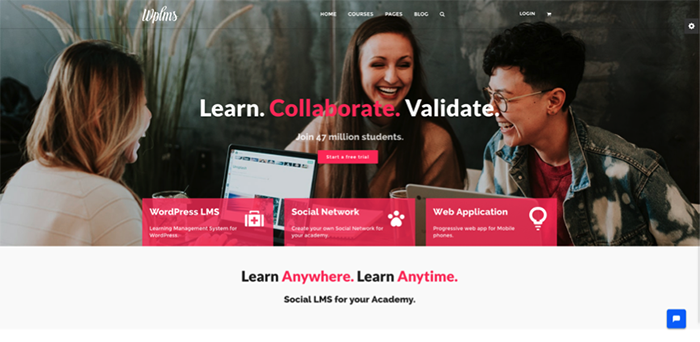
WPLMS is by far the most advanced education WordPress theme ever created it is a fully functional Learning Management System that allows you to manage and sell online courses and even create quizzes and manage them. Track student performance, receive and make payments via the system, sell additional goods and create other online learning materials. This theme won’t be the right fit for the regular school and university website but this theme is here to become the next Codecademy, Coursera… The good thing about this platform is that you don’t need to have any coding or programming knowledge unless you want to custom CSS in the theme.
Step 5. Downloading and Installing WordPress Plugins for Educational Websites
Some educational themes include LMS plugins inside the theme package. But some of them do not have. To these themes, having an educational theme for your school website is not enough. You will need more functions in your websites. If you are looking for an online school website, you will need a plugin that supports you to create an online course for the student to enroll, etc. Therefore, the next step will be installing the plugins that help you to expand the functionality of your school website.
There are many types of plugins that can support you in creating your website for education. But first, you need to know how to install the plugins on your site.
First, you need to login to your WordPress Dashboard.
Then, click on Plugins/Add New.
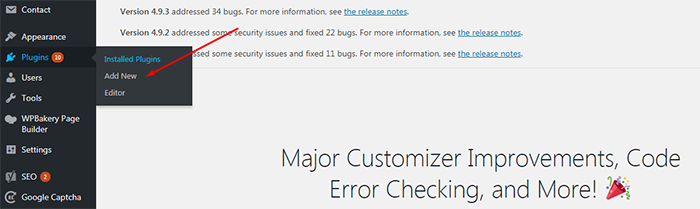
Similar to upload a new theme, you also have 2 ways to upload WordPress plugin: by searching on the list of plugins or upload directly from your computer with the “.zip” file.
After choosing a plugin from the list or upload from your computer, click on Install Now to install the plugin. This will take a few seconds. After installing, click Activate to activate the plugin.
Now, the plugin is ready for your school website.
As I mentioned above, there are many types of WordPress plugins that support you to build a learning management system on your website. Here are some best plugins:
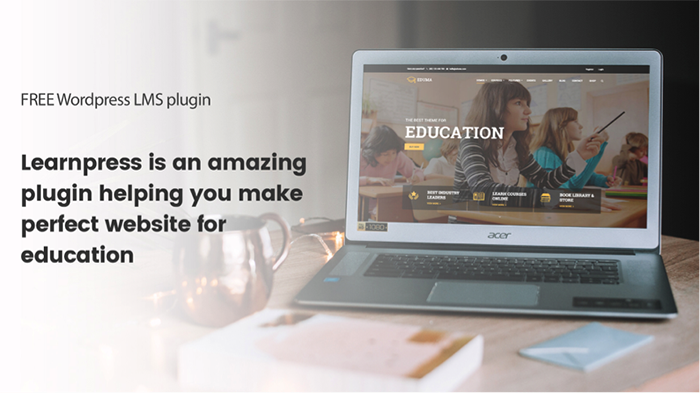
LearnPress

LearnPress is a FREE WordPress LMS plugin with powerful features. Using LearnPress, you can easily set up for your school website by creating courses with lessons and quizzes inside the courses. You can duplicate lessons and quizzes from a course and assign them to other courses. The plugins also support you to import and export content so that you can use it on other sites with LearnPress. LearnPress also has default payment with PayPal that allows you to sell the course online. Besides, to support the plugin, there are many free and paid add-ons (from $19.99) for LearnPress such as content drip (scheduled content), assignments (create an assignment for courses), grade book (keep tracking of students’ progress), etc. All purchase for LearnPress is the onetime payment with lifetime update and usage. The pricing plan for LearnPress is flexible. You can choose to buy add-ons separately or together with Pro Bundle ($249.99 including all premium add-ons) or buy with the theme for only $59-$69.
So, why do not try with this LMS plugin now for free?
LearnDash
LearnDash is a premium WordPress plugin comes with many features fitting a website for education. The plugin comes with multi-tier courses where you can create courses with lessons, quizzes, topics, and categories. The drip-feed content helps you to schedule lessons/quizzes during the course. It also has a quiz and test management tools. You can easily set prerequisites for students such as finish a lesson before going to the next one. The only concern about LearnDash is a pricing plan for this plugin. It starts at $199 and the price is yearly that means you need to pay every year to use this plugin.
However, LearnDash is also a good choice for an educational website.
LifterLMS

LifterLMS is a learning management system WordPress plugin which is similar to LearnDash. The plugin allows you to create multi-tier courses with training modules, lessons, categories, etc. It comes up with integration with many payment gateways of PayPal, Stripe… The plugin also has content dripping, course prerequisites, and group memberships to offer even greater control over the entire course duration. LifterLMS also has a great selection of add-ons that allow you to manage affiliate programs, integrate with eCommerce plugins, connect to email marketing, etc. The similarity with LifterLMS, users need to pay every year to use this plugin. The price for LifterLMS is from $99 – $999 per year.
Besides 3 plugins above, many other plugins are supporting you to create an online school website such as CoursePress, tech press, Sensei, etc. They have a similar function of creating courses, share courses with quizzes, lessons of videos, audios or texts, etc. With these plugins, you can sell the courses on your sites.
In general, it is your choice to choose a plugin that meets your requirements. Besides plugin supporting you to create online courses, you also need plugins for SEO, Security, and Backup your site.
But, remember not to overload your websites with too many plugins.

Step 6. Adding Content and Information for Your School Website
Now, all frames are set up and ready for you. It’s time for you to add content and information related to your school/educational institute. At your Dashboard, you can add new pages or new posts for your site by going to Pages/Add New or Posts/Add New.
For an educational website/school website, I highly recommend these following content:
- Information about the institution and contact details. You should give brief information about the institution, its establishment, certification, rewards, its aim and courses they offer, etc. You should also provide the contact details of your school, its address, telephone numbers, Google Maps location, etc.
- Classes and Courses. A section providing information about the classes and courses offered by the school. It is important to mention both the summary and details of the courses, the number of students’ enrolling in a particular class and course, duration of a course and maybe schedule of it.
- Gallery. This section should show off pictures, images, and videos from your school activities, events, achievements, etc.
- News and Events. They include posters of recent or upcoming activities, seminars, workshops, articles, announcements, etc. They also include awards, education, and career enhancement training.
- Student’s info page. This is a section where you can add the personal information of your students, their achievement, progress, and exam details.
- Faculty members. This section includes the personal information of all the teachers, the course they teach and their years of experience.
- Testimonial. In this section, you can add parents’ or students’ reviews towards your school and activities.
- Why Choose Us Section. You should display the achievements of your school, post photos of your school, teachers, and outstanding graduates and tell about the reason why parents/students should choose your institution.
- Student Success Stories. This section is where you can display your students’ achievements, skills and success story.
- Blog/Newsletter where the students’ articles, creativity, and writings are published either daily or monthly or annually.
Well, it’s all the steps that you need to go through if you want to create a website for your institution/school/university/learning center. Once you follow my guide step-by-step as above, you are now having a completed website with all necessary tools and ready to be published on the Internet.
But, do not forget to keep updating your website continuously. I hope you will get success with your school website!